Showing posts with label journalling. Show all posts

Saturday, April 6, 2013

Just The Right Inspiration

For a few weeks now, I've been meaning to create a journal to record my thoughts as I work through a book called Healing From Trauma by Jasmin Lee Cori (which I highly recommend if you're looking for this sort of book).  Anyway, I hadn't quite decided on the format I wanted to use until my friend Kathie told me about Valerie Sjodin's art journalling.  Valerie is an incredible artist and she has created a number of stunningly beautiful art journals.  This gave me a jumping off point.  I loved the idea of some interesting edges and flaps as well as little pages within the bigger ones.  

Once I had the journal bound, I got started on the first spread.  I've decided to call it 'a healing journey', so the journey begins with that first spread.  I've mentioned in the past that it is my goal to do Art Every Day because I find it very relaxing and even healing at time.  Today was no exception.  As I started working on the page, thinking about things as I worked, I felt the burning need to start journalling.


I stopped working on the overall spread so that I could quickly finish the lower left area in which I knew I wanted to do some journalling so that I could get my thoughts down on the page.


Once I had written down my thoughts, I got back to finishing the rest of the page.

I incorporated part of a map into the top of the page and drew a bicycle to represent my other passion, cycling, which is another vehicle (no pun intended) for allowing myself to work through issues when I just need some 'zen' time to burn energy and think.  Those endorphins do wonders!

Here's the finished spread:


Wednesday, February 27, 2013

Bead Journal Project: February and a Red Herring

Here's the next instalment in my BJP 2013. I was a bit worried about how the puzzle pieces would come together since it's tricky to bead a perfectly straight edge when using little round beads, but as you can see in the second photo, showing the first two months together, the joint is not too bad.  Working on the little interlocking 'tabs' of the puzzle pieces is a bit tricky, and of course I have to be careful to make sure I'm using the right colours so that the little buildings match correctly from one piece to the next.  The bright sky is a nice juxtaposition to the gloomy February we've been having...I can't wait for Spring to get here!
Okay, it might not be a herring but it's a little red fish!  On Sunday evening, while watching the Academy Awards, I added the beads to this fish that I had sewn up earlier in the day.  He's about 3 1/2" long and he's going to be used as an embellishment on a piece I'm planning to enter into a juried show.

Sunday, February 10, 2013

I Really Need Some Discipline...


My plan for yesterday was to do some sewing.  I've got several art quilts in process that I really want to finish (honest!).

Enter Joanne Sharpe and her Letter Love 201 online class...  I know I can do these 'lessons' whenever I want.  I don't have to keep at them because as Joanne always reminds us, "You bought the book! You have these lessons forever!" But they're just so much fun.  I can just sit at my desk with my pens and watercolours and play all day.

After dinner I finally 'forced' myself to spend an hour sewing... and then you won't believe what happened... Yup, I was back at that damned desk with a pen in my hand...

Anyway, here are a couple of pages I did.  I love both of these quotes. In fact, if you look closely at the page with the white writing you'll see that I used these same quotes under the large focal word on the respective pieces.


Can you tell that Valentine's Day is coming soon?


Friday, February 8, 2013

Polka Dot Letters and Words...

Here are a few of the fun pages I've been doing while taking Joanne Sharpe's latest online class, Letter Love 201.  It's a great way to get into an art trance and just doodle!

The word collage was done on an old dictionary page.  The coloured border/background is done with pan pastels.

The lettered page below, on the left, was just not popping for me, so I added some polka dots to all of the letters in my first and last name (I had to add an extra 't' because initially there was only one) and then I gave it a bit more of a colour pop too.

If you need something to pass the time, figure out where the extra letter was squeezed in on the second image.  It shouldn't be too hard since you already know it's a polka dotted 't'.


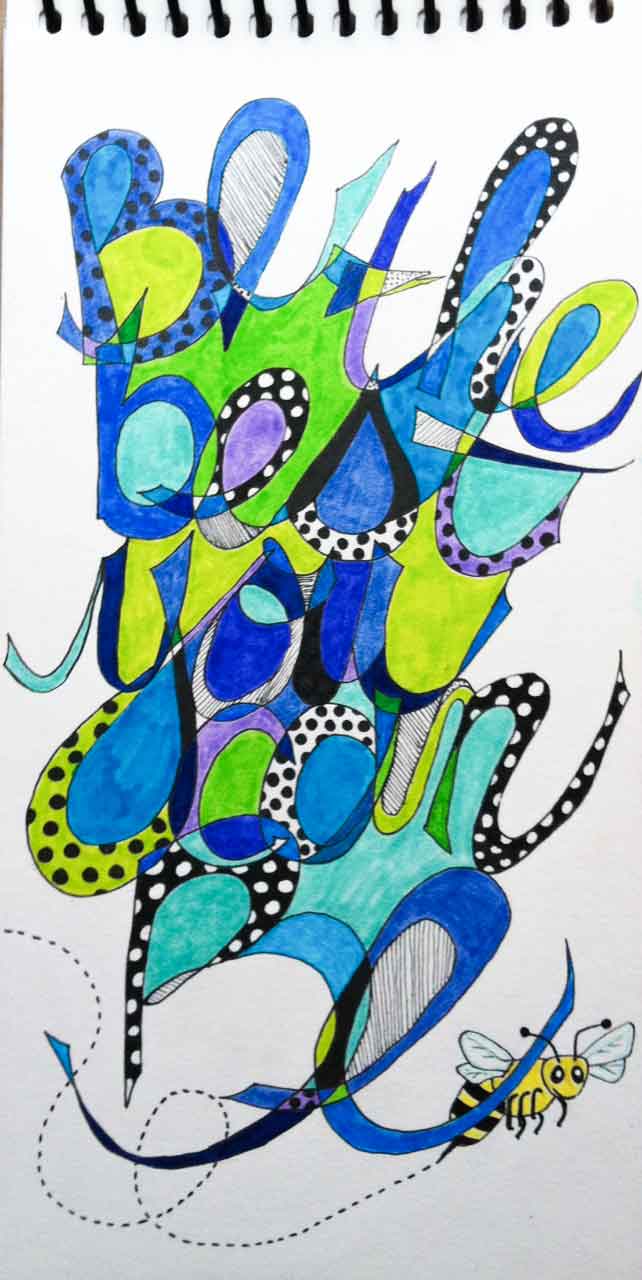
And finally this last piece for today...I think I'm getting a bit carried away with all the polka dots and the 'bee' is just way to cutesy for my usual style, but oh well...

As I look at the bee here, I don't think those little wings are going to support a bee that size. :o)

The jumbled letter piece was definitely my favourite of these three activities.  I can see some potential for variations on that idea.  I love the dimensionality of the layers of letters.


Wednesday, January 30, 2013

Bead Journal Project: January

After the large undertaking I took on for BJP 2012 (you can see the finished piece here, or in person at the Cultural Centre in Georgetown where it is currently hanging in an art display to celebrate the grand re-opening), I decided to scale things back slightly.  I chose to use puzzle pieces approximately three inches square as my shape.  I drew up a basic plan for the final overall picture, and each month I will complete the next piece of the puzzle, literally.  This means that the journalling aspect has sort of gone by the way side, but since I'm keeping an art journalling calendar too, it will record the on-going events of my life as it unfolds over the course of the year.  However, having said that, I have snuck in a bit of journalling because I wrote something down on the piece of stabilizer, using a Micron, before I started beading.  I plan to record what I consider to be the most important event that transpired during the month (or at least the first 3 weeks of the month) as a secret journal entry that I will know is there, but others who look at the piece would never guess!  So don't tell anyone, okay...  I'd hate to think someone might take the beads off to see what was written underneath!  

Monday, January 28, 2013

So...Now what?

I've been trying a few of the techniques, or variations of them, from Creative Jumpstart series.  In this case, I started with a page that had a bit of paint on it from a day when I didn't want to waste the paint left on my brush.  The page was actually like this for almost a year.

In addition to learning some new ideas, I've also pulled out a few materials that I have but haven't used for a long time.  I started with a couple of Pearl Pens, in blue and copper.  Their fine tips are great for drawing with the paint right out of the 'pen' (probably why they're called Pearl Pens).  I drew a bunch of circles and some spirals ('cause that's just what I do...).  I love the wonderful raised texture they give you when they dry.  


I thought I'd add some stamping, but because of the raised edges, it can't easily be done.  Enter that great tissue paper technique!  Stamp on the cheap tissue and then adhere it to the page using gel medium.  Very cool!

I also had some scraps of tissue paper on which I had hand written some text using a Micron pen, lying in my tissue paper bin so I added them too.


But, as you can see it needs more...

So I got out some white acrylic paint and a fine paint brush and I added some white around those raised blue circles.  Then, just because it was lying on my desk I picked up an empty tape spool and stamped it in the paint and added a few more circle with it.  I like the double concentric circles I get with this particular spool.  


But, I think it still needs more...


I got out the black paint and added some 'shadows'.  And then I stared at the page for a while and finally asked myself, 

"So... Now what?  And then it came to me...


Sometimes you just have to go with the obvious.  It's not a work of art, but it certainly was a great way to try out some new ideas.

Wednesday, December 12, 2012

April Calendar Art Journal

Yesterday I was able to finish the watercolour painting of the April calendar page.  I was a bit unsure about the 'cheesy' idea of using raindrops for the journalling shapes, but I'm really pleases with how the page turned out.

I used a 'light' hand lettering font since April is a month of new beginnings.  The long dark winter is over and everything just seems to lighten up.  


 I found this cute little girl in a magazine add (in a March issue from 2009...sometimes being a bit of a pack rat comes in handy) and I thought she'd be perfect since I used to love playing out in the rain.  Realistically it would never have been warm enough to do this in April, but it still makes me smile.
 I also found these two pairs of legs so I gave a couple of the raindrops legs.  And, since they had legs, I also drew in a couple of pairs of eyes so they can see where they're going :o)


In addition to drawing in little lines, circles, triangles and squares to represent rainfall, I wrote, in very tiny letters, using a Micron 01 pen, a variety of phrases such as, "it's raining cats and dogs; rain, rain go away, come again another day; it's raining, it's pouring the old man is snoring..." etc.

I used the Peerless watercolours to do this page.  They're wonderful to work with!  I wasn't sure what to use as my background colour since it was raining but I didn't want it to be too dull and dreary.  I settled on the Bismark Brown (one of the colours in the Joanne Palette Colors - a palette made up of 15 colours specifically selected by Joanne Sharpe for her Color Love online class) and I couldn't be happier.  It's a lovely warm colour, yet not too bright for my rainy day page.


Friday, September 14, 2012

Acceptance in Seven Words

Bonnie at Pixel Dust Photo Art posed a fun challenge for Photo Art Friday this week:


this week you can use the prompt to compose a seven word sentence that describes your life or experience or process as an artist (be it a photographer, painter, mixed media artist, digital artist, whatever...) and marry your sentence to a piece of photo art that somehow illustrates your sentence.


This photo collage is being linked to Photo Show Off, Texture Tuesday, Sweet Shot Tuesday, Our World Tuesday, This or That Thursdays, Photo Art Friday, Shoot, Edit, Submit, Fabulous Friday and Photo Friday Link Party.

Saturday, April 14, 2012

A Little Rain Must Fall


Today while waiting for bread to rise I had some fun creating another journal page.  I used a background spread I had done a while ago and added a wonderful quote by Longfellow.  Considering the grey clouds outside, it just seemed like a good choice.  I started by adding an umbrella cut out of a page of text and then I added the quote.  


Because I often end up leaving out words as I write, I thought it would be safer to write the quote in pencil first and then go over it with my Pitt pen.   


And finally, the finished piece, complete with a few clouds and raindrops.  It's hard to see in the photo, but the raindrops are made with metallic pens which give them a bit of shimmer.  If only all rainy days could be this bright and colourful!

Tuesday, February 28, 2012

10 Truths About Me

In Beyond Layers, Kim has challenged us to share '10 Truths' about ourselves.  What a perfect fit for the Letter Loved journal.  Here are 10 truths about me:

 1.  I am married to the most amazing man! So true.  He is loving, thoughtful, considerate, supportive, understanding...the list goes on.  I am truly blessed!

2. I am committed to doing art every day.  Whether it is a long time in the studio or a few minutes in a journal, this is my personal therapy...my happy place.

3. I am incredibly proud of my son and the man he has become.  Sure, there are still moments when he makes me crazy, but he is truly wonderful. 'sigh'

4. I am passionate about my art.  (see #3) Whether it is fibre art, journalling, beading, photography...my art brings me joy and allows me to focus on all the positive things in my life.

5. I am a bit of a loner... I like quiet... I find it challenging to interact with others.  (see #2, #4, #6, #9, #10) I am comfortable in my own company and sometimes crave 'alone' time to help me heal.

6. I am an avid reader... hooked on my iPhone Kindle app. Who ever thought you could carry an entire  library in your pocket?  Heard about a new book that you want to read?  There's also a huge bookstore in my pocket that delivers in seconds no matter where I am.  And I can read the first chapter for free to make sure I really want to buy the book!  Awesome!!!

7. I love my coffee and my amazing husband's thoughtfulness in bringing it to me every morning. (see # 1) What more can I say?

8. I have just learned how to bake my own gluten free bread. Fresh, hot from the oven breads that don't leave me in excruciating pain.  And the variety is endless:  breads with nuts and seeds; classic French bread; sourdough... (If you're on a gluten free diet, check out Bette Hagman's Gluten Free Gourmet Bakes) [Thanks Sue and Kay for telling me about this great resource!]

9. I love to cycle (30 km/day ideally).  (See #5 and #10) Cycling helps me heal body and mind.  When I can't cycle outside I use my trainer indoors.  Talk about going nowhere fast! LOL)

10. I struggle with depression and work hard to see the JOY in life. (See #2, #5, and #9) And I struggle with the stigma of admitting this fact but know that we all have to see it for what it is - a physical illness (because the brain is part of my physical being!).

Bonus:  To quote Joanne Sharpe, "I am a letter dork".  And I'm proud of it!!!
Monday, February 27, 2012

Colourful Lettering: The Journal Continues...

 Today's post is a short one (did I hear a sigh of relief???).  I just wanted to show you the first few pages of the journal I'm working on.  This is the final project in Letter Love 101.  It has been such an informative and inspiring ride.  I highly recommend that you check it out.  It's the best online course I've ever taken!

I love the contrast of the bold black and white duct tape and washi tape with the bright coloured papers.


 My moto for keeping my sanity...make art every day!


I wish I knew who first said this.  What a wonderful quote.  Right now I still feel like I have two left feet (maybe even three because I keep stumbling!) but I'm working hard to learn to dance in the rain!  One step at a time...

Thanks for visiting!


Sunday, February 26, 2012

DIY: Home-Made Washi Tape

Before I get to the home-made washi tape, I wanted to share the improvements I've made to my new 'Journal on the Go' (see original post here for more details about how and why I made it).  Since taking Joanne Sharpe's great Letter Love 101 online class, I just couldn't stand looking at those plain pockets.  They just begged for some lettering on them!  I also added a belt loop to hold my new home-made washi tape!  Keep reading I'll tell you all about how to make it.
Mouse over photo to see the 'before' image.

This is dedicated to my new cyber friend, Heather, who lives in South Africa and can't get her hands on washi tape (no local shops carry it and none of the online vendors will ship to South Africa).  I've heard about this idea in a few places, and today it was time to try it.  It was easy, fast and really inexpensive.  I started with some double sided tape that I got at the Dollar Store and some tissue paper that I had saved because it was still 'like new' Yes, I can be a bit of a pack rat but it's environmentally friendly!
I pulled out my ink pads and stamps and just started stamping on the tissue paper.  I love black on white to contrast all the other colours I use in my journalling, but you could use coloured ink pads if you prefer.  I personally like StazOn but use whatever you prefer.
These five stamps are especially great for this.  They're the clear ones that you stick on the acrylic block and I simply lined all five up side by side to make the printing really fast.
The next step is to turn the tissue paper over and put the two-sided tape on the back, smoothing it out as you go (sorry, I forgot to take a photo at this stage).  I don't worry about a few wrinkles because I actually like the added texture and interest.

You're now ready to cut the tape out.  Just cut along the edge of the tape.  This is a great activity to do while 'listening to TV' (I hardly ever actually watch TV anymore. LOL).
If tissue paper is good, why not old dictionary pages?  I get old books at a wonderful recycling depot called Wastewise which recycles all sorts of things for incredible prices.  I can get old hard cover books (also great for altered books - learn more here) for 50 cents!
One thing led to another and I pulled out this 'love' paper which is actually the inside of an envelope that I took apart (Thanks Diane. The birthday card you sent me last month is still bringing me Joy!).  I know you can get some beautiful printed tissue papers so you could make some washi tape with those too.  I'd love to hear your ideas for what else we could use to make our own unique, inexpensive washi tape. 
Here's my new stash of washi paper.  You'll notice some coloured pieces.  Those are some bits of old book pages that were used when I was making background papers.  Nothing goes to waste!
Here's the washi 'stash' all neatly organized.  I rolled them, secured them with little binder clips (another Dollar Store find) and put them on a large binder ring.  This is why I had to add the belt loop to my Journal on the Go!  The shorter pieces were just tucked into one of the pockets.


It's been a very busy couple of days.  In addition to the above mentioned pursuits, I also made some more beautiful background papers.  If you want to know more about the process, check my previous post here.

Saturday, February 25, 2012

Free Vintage Digital Stamps

I've found a great blog that offers free vintage digital stamps and digi-scrapbook papers.  They'll be great for using in the making of ATCs, journalling projects, and more.  Here are a couple of examples of things I've found on Pamela's site. Look for the link in my sidebar to the right and have fun!

I'd love to hear how you plan to use these great FREE images.

Thanks Pamela for sharing!!!

Friday, February 24, 2012

Recycling An Old Pair of Jeans = Journal To Go!


I've had an old pair of my husband's jeans lying on the studio floor since I used a bit of the denim in a piece of mixed-media art that I'm working on.  Today, as I glance down at them while doing something else I suddenly got a great idea.  This is where my husband would say, "Self praise is no praise." but I really do think it's a great idea :o)

I used the back of the jeans, pockets and all to make a journal cover.  It has a pocket on the front and back to hold a selection of your pens, markers, your aqua brush, etc.  You could even fit a few small rolls of washi tape (see note at end of post and click here for a DIY for making your own washi tape) in the pockets.  I used a bit of left over upholstery weight cotton to add a pop of colour.
Now you've got an easily portable journal so you can do "art every day" no matter where you are.  Wouldn't this be great on a long plane trip?  Australia is on my bucket list and the idea of being able to journal along the way would certainly make the long flight seem to pass faster.
I also found a bit of time to make a birthday card for one of my great nieces, so it's been a good day!
Note:  Someone in my Letter Love 101 class shared a wonderful link on making your own washi tape.  It's absolutely brilliant and so easy!