Showing posts with label Dylusions Spray Ink. Show all posts

Saturday, May 9, 2015

DLP Week 17: Playing With Inks...

The week 17 Documented Life Project challenge was to use inks. I have a good collection of acrylic inks, spray inks, Tsukineko inks, Posh Rainbow Inks by Ranger, Inktense pencils (love these!!!), India inks...you get the idea...so this week's challenge was just about pulling out the media and playing. 

Yoshi and Wafer were most interested as I added the final doodles while enjoying the beautiful evening out on the deck.


Here are a few close ups, followed by the full page spread.  

Happy Mother's Day! 


Friday, October 25, 2013

Blog Hop Featuring Cecilia Swatton's StencilGirl Designs...

I'm participating in another fun StencilGirl Blog Hop, this time featuring stencils designed by Cecilia Swatton!  I'm using Cecilia's "Swatton Grid" and "Mimosa 6" stencils today.

6" x 6" Swatton Grid
6" x 6" Mimosa
Sometimes you have to work smarter, not harder, so today I'm doing just that.  I'm thinking ahead to the busy Christmas season, and I want to make my own gift tags this year.  I also want to get my November art journal calendar spread done, so in comes the 'smarter'.  

I cut a bunch of these little tags out of card stock, hole punched them and then pulled out may art journal calendar.  
I spritzed some yellow Dylusions ink spray on the page and used a baby wipe to swirl it around a bit.  

Then I arranged the tags onto the page and the fun began.
Since November can be such a dark, gloomy month, pulled out my bright spray inks and sprayed through Cecilia's stencils to create some beautifully colourful patterns on the page.
Here you can see me spraying some grass green through the "Swatton Grid" stencil.

After creating all of that fabulous background colour and texture, I removed the tags and set them aside.

I pulled out my Liquitex paint markers and added some outlines and numbers, etc. to the calendar spread.
Then I added some extra texture to the journalling blocks by stencilling some white through the stencils, alternating  "Mimosa 6" and "Swatton Grid" 


I added the name of the month and the year and the calendar spread was done.


And now to get back to those Christmas tags I was making... I added some doodles to the beautifully patterned tags using a gold Pearl Pen and all they need now is a pretty bit of gold yarn and they're ready to go!


I hope you've enjoyed your stop here!  Remember there's a giveaway on the 
StencilGirl Talk blog and Cecilia will also have a giveaway of her own on her blog.  

ALL comments in the entire hop are eligible to win. 
The more blog's you comment on (one comment per blog please), 
the more chances you have to WIN! 

The giveaway will close on Sunday, October 27th at 11:59PM Central Time.


Linda Kittmer-you are here
Linda Cain-hop over here next...

Sunday, August 4, 2013

An ATC Develops...

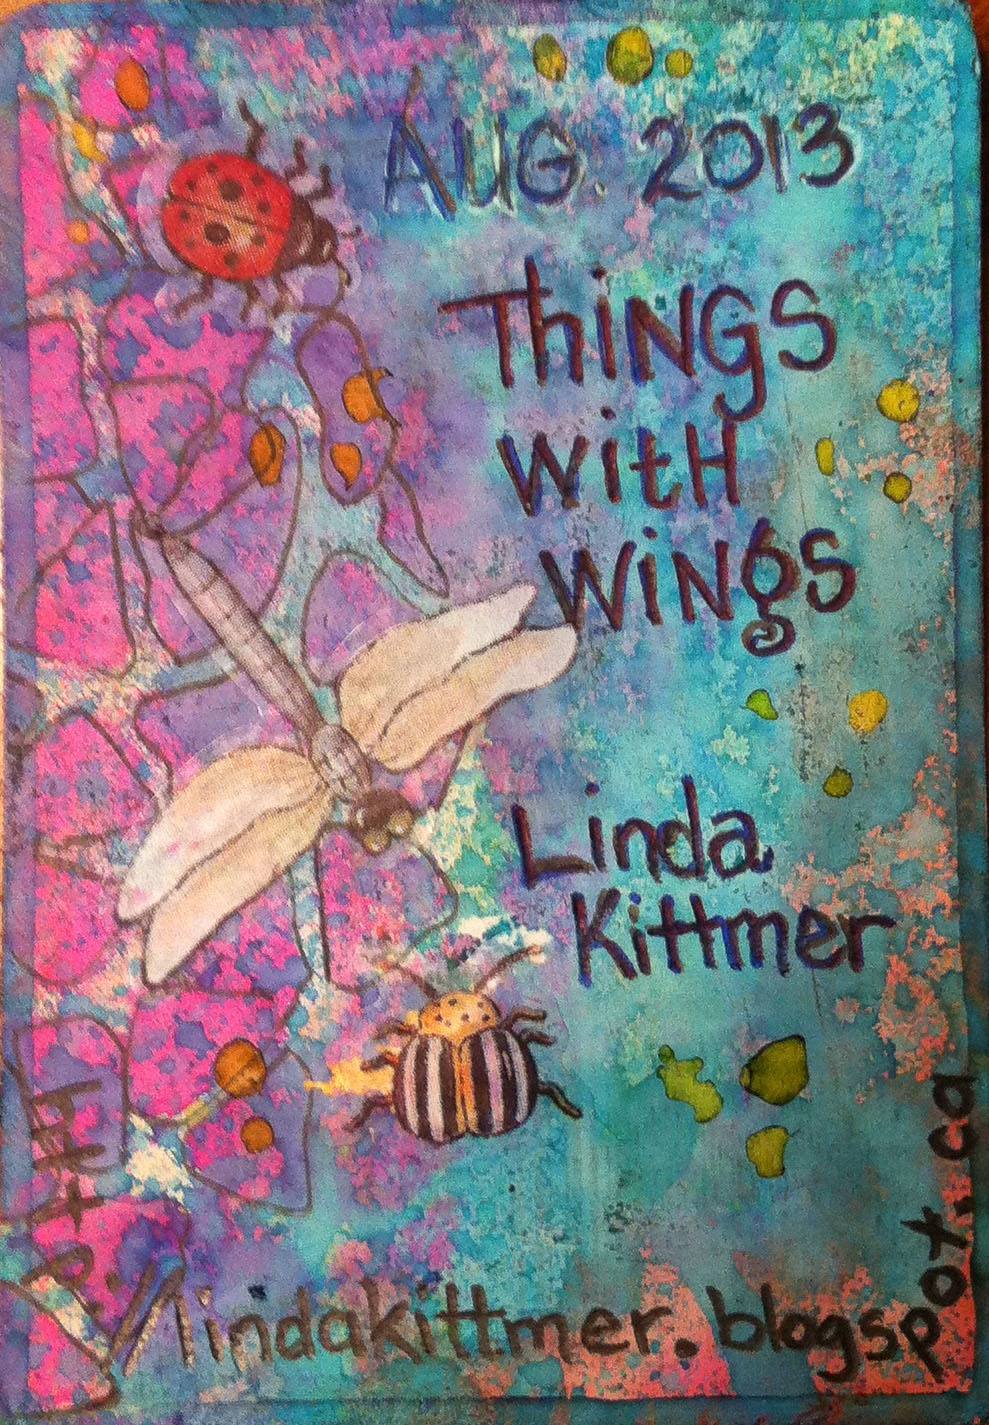
I'm participating in an ATC swap via Facebook, and yesterday I got the art supplies out for a bit of play time.  The August theme is 'Things With Wings".

I started with a scrap bit of cardboard which I roughed up a bit with sandpaper and then applied a thin coat of gesso to both sides.  The text that shows through just gives a bit of extra texture.
 Next I used spray inks and distress stain to add colour.  I used a couple of my StencilGirl stencils too.
This is Terri Stegmiller's 'Blades' stencil.  I flip the stencil over onto a page of text to use up the excess ink.


I added various elements by tearing pieces of previously embellished papers I had lying around. I tore a branch from the text page used to 'clean' my stencils and then I cut out and coloured a bird that was lightly stamped on scrap paper one da when I was cleaning that stamp.  I spritzed it with the blue spray ink, but if you srr it in person, you can see the black ink from the original ink show through.


 Using the tube in the spray ink bottle, I 'draw' a thin border around the edge on both front and back.

I then added some finishing touches with black and white pens, some letters cut out of the newspaper, and a few stickers and it was done.
And here's the finished ATC...
front
back

Saturday, March 9, 2013

Playing with Texture in Lettering...

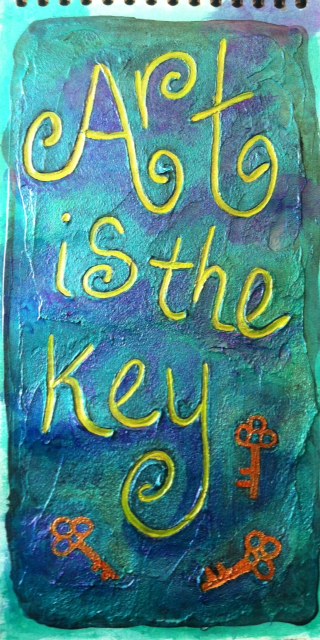
Sparked by another couple of lessons in Letter Love 201, I've been playing with texture in lettering.  Joanne had suggested an idea using heavy body paint, but instead mixed some black gesso with Golden Fiber Paste and wrote in it while it was still wet.  When it dried, I painted it using Silks Glazes.  I love the way the Silks work on black!   The close up gives a better view of the texture and depth of the lettering.  I used a rubber stamp of a key to stamp into the wet paste and gesso, but it isn't as deep as the lettering.


This piece is the favourite of a number of pieces I created using matte medium and Dylusions spray inks.  I'll end up using them as embellishments on journal pages at some point.

Saturday, March 2, 2013

Creative JumpStart Revisited

During January, I was watching the Creative Jumpstart 2013 videos, and I did try out a couple of techniques, but because of various other things I was doing, most didn't get too much attention.  So, I've decided to go back through the archived 'Jumpstarts' (click on CJS 2013 if you want to access them) and create a journal with the techniques and some notes for future reference.  


 I'm really enjoying the Glass Bead Gel and with a 50% off coupon at Michaels, the price was great. I love both the texture, and how it makes the Dylusions spray inks just pop!

Thanks to Nat Kalbach and all the other Jumpstart artists, these videos are full of lots of creative ideas for using things that you may already have in your stash in some new ways.
 

Friday, February 15, 2013

Five Layers of Fun...

...or perhaps a few more.

One of the lessons in Letter Love 201 was to try working with a dry brush technique while lettering with a paintbrush.  A few weeks ago I bought some liquid frisquet or frisket (*see end of post for more info) and I thought this might be a great place to try it out.

1. I started by using the dry brush technique to write the words.  Then I painted over them with watercolour and used a bit of Dylusion's spray (yellow) through a stencil.

1a. You can see the texture created by the dry brushing. Interesting to note that the  Dylusion's spray seemed to go through the frisket in some areas.

2. I added some white lines, using a Uniball Signo, around the letters to give them a bit more pop, particularly because some on the right side didn't show up too well (dry brush was a bit too dry).

3. Still using the white pen, I added the border and the white 'bubbles'.

4. and 4a. Show the highlights I added to the bubbles and the cross hatching in the border.

5. and 5a. The final step was to add another layer of texture by journalling in the red areas. I decided to use a very fine black pen (0.05 Micron) so that the journalling would be very subtle.

And here's the finished page:


*Liquid frisket, or masking fluid, is a combination of latex and ammonia that is used by artists to temporarily block out a portion of a painting until the areas surrounding it has been completed. It can then be gently removed so that portion can be painted or left white.
Masking fluid is similar in consistency and texture to paper cement/rubber cement glue. Once applied to the paper, it dries fairly quickly, developing a rubbery texture that you can rub off with your finger or an eraser.