Showing posts with label texture. Show all posts

Thursday, September 11, 2014

Focus on Texture...

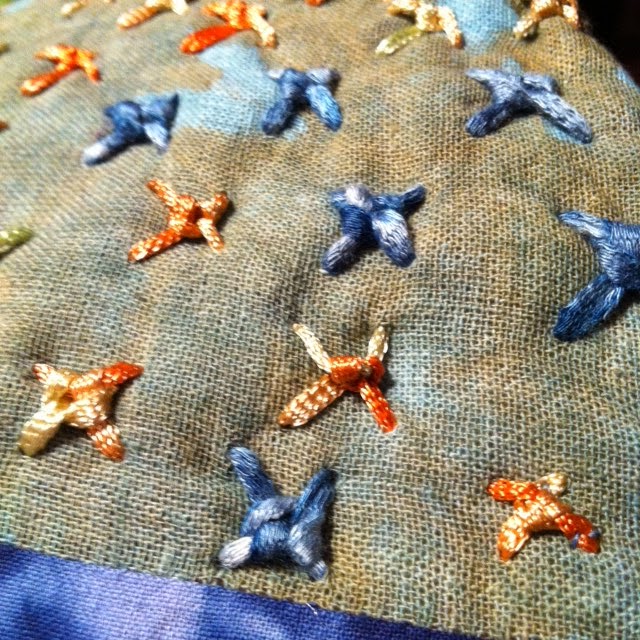
Fibre Content is now open (Sept. 9-16) and today I was acting as docent for the afternoon. While I was wandering around the gallery, I was so enthralled with the incredible texture in the art! I took some close-up detail shots of many of the pieces to share these fabulous snippets of texture.

I do hope you are able to go and see the show in in person!


Friday, April 4, 2014

Embellishing the Text...

I last posted about this piece here, when I had added the text using painted fusible web. Well, I've finally found my way back to it (life's been getting in the way!) and I've now finished another step in the process. I've layered the batting under the top (no backing yet), and free motion stitched around all of the text to outline it.


As you can see, I've also begun the hand stitching on the text to add a little more texture and interest.  So far I've just finished the first word, but I'll catch up on some TV listening and hopefully get all of this stitching done in the next few days.  I'm using one of my hand dyed cotton threads for the stitching. Once all of the hand stitching is done, I'll add the backing and then finish the machine quilting.  By doing it this way, any 'messiness' that may result on the back from my hand stitching will be covered!


Monday, November 25, 2013

Sunset Silhouette...

I've been working on a lesson by Kim Klassen in Beyond Beyond, in which she taught us how to make 'magic' textures by inverting a texture and then adding some adjustment layers.  I used Kim's 'kk_dollard_grunge' texture to create my magic version and then used it over this image to add a bit of texture to the silhouette.


Wednesday, October 23, 2013

Adding Texture With Hand Stitch and Revamping the Group Of Eight's Blog...

Last week I posted about some inspiration I got from some wonderful threads my friend Heather gave me. Well, it would seem other art has been set aside and this has been my focus for the last couple of days.  I designed and pieced the components of this new piece, yet to be named, and I've been adding some texture with hand stitch.  I'm really enjoying using the Sorbello stitch (thanks again to Heather for teaching it to me!). I'm also adding other hand stitch to various areas before I move back to the machine to add some dense quilting.  I'm still amazed that this all started because my friend gave me a pretty skein of interesting thread! (Leah, I believe this is what you'd call a squirrel. LOL)


But, prior to working on this piece, the weekend was spent revamping the Group of Eight Fibre Artists blog.  Please pop by to see the new format, learn more about our fibre art group  and 'meet' the other artists in the group.  There are a few artists I'm still working with to get photos taken of their work, but most of the galleries are ready for viewing!

I'm linking to WIP Wednesday at Needle And Thread Network.

Monday, July 8, 2013

Rusty Bird in the Garden


One of my neighbours has the most wonderful garden and the other day while I was walking by I noticed this delightfully charming rusty bird perched on top of one of the rocks.


"Lilly" texture compliments of Kim Klassen.

Linking up with Our World Tuesday, Texture Tuesday, and Sweet Shot Tuesday.

Monday, July 1, 2013

My Gentlemen

While at a Wedding in June, I took this photo of my special men.  I knew that the light was wrong, as I was shooting up at quite an angle and the sun was behind them, but it turned out to be a wonderful silhouette.  I removed a few minor distractions from the background so that all of the focus is on the four men.

"Confidence" texture compliments of Kim Klassen.

Linking up with Our World Tuesday, Texture Tuesday, and Sweet Shot Tuesday.

Tuesday, June 18, 2013

Great Blue Heron

Last weekend I saw this beautiful Great Blue Heron patiently waiting for his dinner outside the Cambridge Mill.

There is something about these wonderfully majestic birds that intrigues me.  I'm fortunate to be able to enjoy them at our cottage, by the pond near our home and out on various explorations while cycling, etc. and yet I just never get tired  of watching them!

They always make me smile too, as I recall the one that used to visit my parent's backyard to steal the koi from Dad's pond.  Dad finally made a wonderful wooden model of a heron and put it by the pond as a decoy to ward off the real one.


"3112" texture compliments of Kim Klassen.

Linking up with Our World Tuesday, Texture Tuesday, and Sweet Shot Tuesday.

Wednesday, June 12, 2013

Adding Stitch...

Adding texture with machine stitch
Last week I posted about Angie Hughes' book and showed you the first stages in the piece I've started based on her technique.  So much for putting it out in the sun to dry faster...LOL...I've been juggling several projects and while that was drying I got busy with something else.  I finally got back to it to add the machine stitch, giving the piece even more texture.
Long threads created with 'jump stitch'
Angie uses a stitch she calls a 'jump stitch' in which you set the machine for free motion stitch, do a few stitches in place and then 'jump' to another spot, leaving long threads between the areas you're tacking down.  After the stitching was done gesso was painted onto the entire surface to seal the piece, getting it ready for the acrylic paint. Time to let it dry again so I'll pick up another ongoing piece and continue on this another day.


Wednesday, June 5, 2013

Texture Technique Using Everyday Materials


I found a wonderful book called Stitch, Cloth, Paper & Paint, by Angie Hughes while I was browsing the art section at the library.

Angie explains her technique for using watered down PVA glue to create incredible texture using cotton and layering it with cheesecloth, tissue paper and other such things.  She then paints the piece using acrylic paint.

This photo shows the second stage, where I'm applying the tissue paper strips using a sponge brush and the watered down glue.


 In the book, Angie tells you to let it dry overnight, but when it's hot and sunny outside, I figure I can speed that process up dramatically.

I'll share more about this piece later, as it progresses.  Thanks for visiting.


Friday, April 26, 2013

Taking Another Creative Jumpstart

I had a couple of minutes last night, so I took another look at one of Nat's Creative Jumpstart ideas.  She used gloss gel medium as a resist by using a stencil and then when the gloss medium was dry she sprayed it with some spray inks.

Although my stencil was giving me trouble (very flimsy plastic, not best suited for this), I quite like the end result.  Because the medium had leaked under the stencil, I used my Uniball Vision waterproof pen to outline the features of the stencil as well as the entire medium marks.  That's the only pen I found worked really well on the gloss medium.

With greater care and a better stencil, I think this technique is fabulous for some lovely texture and shine!

Wednesday, April 24, 2013

The Journey Continues...

A couple of weeks ago, I started a journal (you can see the first post here), and today I have finally finished the second spread.  The journey is all about thinking positive thoughts and moving forward on a healing journey.  I can't think of a better way to do that than through art!


You can see a couple of the stages the page went through as I worked on it.  I just love seeing the transformation as colour and shading is added to the page.

I use a 0.005 Micron to do the actually journalling on the page once the art is done.

My writing is super tiny, but it allows me to get a lot of thoughts onto the page and work through the many things I've been reading and thinking about.  I also like the added texture that the background text gives the page.  It's a great way to make a pretty looking spread (if I do say so myself) while keeping the 'heavier' underlying text from taking over the page.


Monday, February 18, 2013

I Need A Plan 'B'...

after
A few days ago I posted about an experiment I was trying based on something I had read online over a year ago.  Well, unfortunately either I am not remembering things correctly or I'm just unlucky. 

This is the piece I've been working on and after hours of piecing and wrestling with grass trimmer plastic to do the free motion quilting, it was supposed to shrink!  The small sample piece of wool that I tested shrank, but this piece, which is entirely backed in the same wool, unfortunately did not get the memo!  I used the sanitize cycle on my washer and the hottest setting on the dryer...You can be sure that if they were a pair of pants or a favourite sweater they'd now fit a Barbie, but sadly when I wanted, even needed, this to shrink considerably...nothing!  

I guess I can be happy that at least the dyeing process worked as I had planned.  If you compare the before and after images you can see that the after image, while still having a pleasing variations to the different shades of blue, has a more cohesive look to the colour.  But, instead of having a really interesting textural piece, I have a rather boring blue quilt...certainly not the 'fibre art' I was shooting for!
before
And so, I need to figure out a plan 'B'.  I have no idea where I will go from here...

What do you do with a very boring blue 'quilt' with funny plastic strips running through it?  I'll have to ponder this for a while and get back to you...

...'sigh'  

Wednesday, February 6, 2013

Artful Snail Mail Delivery...

In these days of
e-everything, about all we get in the mailbox are bills or packages of things we've purchased online.  But, occasionally there is a special little treasure that arrives.

Last week I posted about a postcard I was making for a postcard swap over on the Artists in Blogland site.

Well, yesterday I got the most beautiful card in the mail from Morag Archer.  I just love the fabulous texture that she has achieved in the hair.
Morag is an incredibly talented artist, and you can see more of her work on her blog.

Thank you Morag!  I'm so glad to have a piece of your art.

Tuesday, February 5, 2013

A Pop of Colour...

Yesterday, while driving to my daughter-in-law's place, I passed this beautiful church and it immediately reminded me of Kim's challenge for this week's Texture Tuesday, 'a pop of colour'. Fortunately I had brought my camera along with me because I knew I'd be driving along country roads and I planned to get some barn shots on my way home, but when I saw this wonderful bright red door on the church I knew it was perfect for for the challenge.  I created the collage in Lightroom, and then added a subtle layer of Kim's texture, 'stamped' using a soft light blend mode to give it a cool, soft look. I used a layer mask and brushed the texture off of the white frame and sashing of the collage, as well as the red door so that the wonderful colour could 'pop'.

This photo is being linked to Our World Tuesday, Texture Tuesday and Sweet Shot Tuesday.

Sunday, December 30, 2012

2013 Cover Page for Art Journal Calendar

I had to back up and do my cover page for the 2013 section of my Art Journal Calendar.  I had already finished the page spreads for January, February, March, April and May, but I had left the first two pages blank so I could do a cover page spread.

I cut the letters for the left side page out of an old dictionary page using a craft knife and then I adhered them to the page using matte medium.


I was surprised by how little they showed up on the painted background until I started doing the black and white highlights around them.


This is a repeat of the message I used for a photo image I did yesterday.  Joy is the word I have selected as my 2013 inspirational guide word!

I used molding paste and a stencil to get the diamond texture that frames the spread. I also used a very fine cursive text stamp to add more interest to the background.


Next I'll work on the outside cover of the journal...

Thursday, November 29, 2012

Just Had to Play Along...


original image
Kim's challenge in Beyond Layers today was to use an image she provided, as well as the latest texture she gave us (both seen to the right) and create our own version, on which we had added a quote.  Well, seeing as the texture was named after me, I just had to play along!

If you're interested, here's my 'recipe':

kk_linda texture

  • duplicate the background image
  • crop
  • add kk_linda (blend mode: soft light 100%)
  • duplicated background image again and moved it to the top layer (blend mode: soft light 100%)
  • add 2nd layer of kk_linda (blend mode: vivid light 19%)
  • add 3rd layer of kk_linda (blend mode: multiply 75%)
  • added an adjustment layer:  cooling filter (82) at 8% density
  • did a levels adjustment
  • added a subtle frame by using the rectangular marque tool to do an inverse selection...used a colour fill adjustment, selecting a colour from the image and then used a multiply blend mode at 29% for that layer
  • add text - font is called 'sweetly broken'

Monday, November 12, 2012

Day Dreaming at My Desk


Mouse over photo to see the 'before' image.
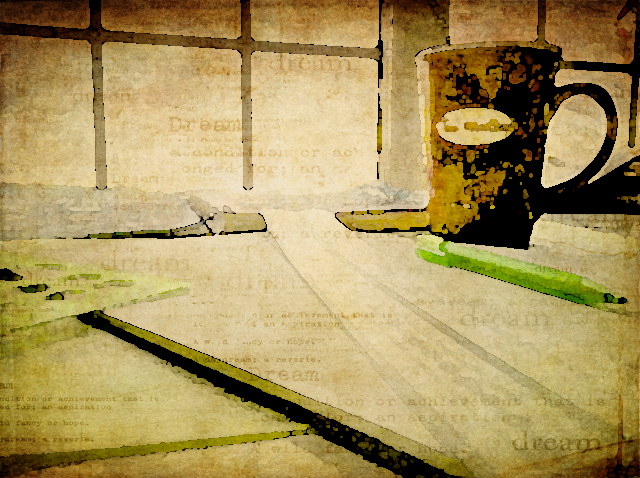
Now that I've got my new desk in my studio, I sometimes find myself day dreaming as I look out the window.  Since this weeks photo themes from Kim at Texture Tuesday and Bonnie at Photo Art Friday compliment one another so well to all this day dreaming, I challenged myself to take a very ordinary iPhone shot of my desk today and edit it in Photoshop to try to create an dreamy, artful still life.

I started with a levels adjustment and then played with the brightness and contrast to get back my Tim Horton's mug which is very dark in the original image.  I added Kim's kk_kristen texture, first at multiply 100% and then again using a soft light blend mode at 27%.

I put on a warming photo filter, flattened the image and then added a watercolour filter to that.  Next I added a couple of painterly textures (a Jerry Jone's painterly texture, and one of Bonnie's painterly textures, both with a soft light blend mode at 100% opacity).  The final edit was to add Kim's kk_dream texture. It just seemed perfect for the 'Dreamy' theme with it's soft subtle 'dreamy' text.

These photos are being linked to Our World Tuesday, Texture Tuesday, Sweet Shot Tuesday, Photo Show Off,  This or That Thursdays, Photo Art Friday, and Fabulous Friday.

Monday, October 29, 2012

Fisheye Fun...

This week I had some real fun playing in Photoshop.  I'm pushing myself to learn more about what I can do with the program, applying things I'm learning from various sources including Beyond Layers and through reading online information from Adobe.  I started with Bonnie's 'cobblestone road' texture. I added all of the coloured balls from a journal page I did by using the clone tool and then making additional copies of some of them, resizing them, changing their colours using hue/saturation adjustments, etc.

Once I had done that, I decided I needed a focal point so I opened the photo of a gull that I took in the spring and I used the quick selection tool to isolate the gull (by doing an inverse selection and deleting the background).  Once I put the gull in it still wasn't speaking to me so I decided to learn how to do a fisheye effect.  Instead of using a black outer frame, I selected a dark gray colour from the cobblestones and then played with the opacity of the layer so that the balls and cobblestone still came through.

I added a gaussian blur to the edge of the fisheye.  Because I had squared off the image after putting the balls on the background layer, I had lost the lovely framing that Bonnie's texture had, so I added another layer of the texture on top, adjusting the sides so it was square (sorry, I can't remember the blend mode I used on that layer).  The final step was to add another very subtle layer of blur to the entire image and then use my round signature brush on the blue ball in the bottom right corner.

These photos are being linked to Our World Tuesday, Texture Tuesday, Sweet Shot Tuesday, Photo Show Off,  This or That Thursdays, Photo Art Friday, Shoot, Edit, Submit, Fabulous Friday, and Photo Friday Link Party.

Monday, October 15, 2012

Look Up...Way Up...


Kim's challenge this week for Texture Tuesday was to have us looking up.  This is the perfect time of year for this as the colours in the autumn trees are spectacular!  I added three of Kim's textures to this image: Just Stitched, Trust, and Warm Sun.  I love that bit of zigzag 'stitching' at the sides. I brushed away some of the texture from the centre of the image so that the colours of the leaves were a little more intense in the centre.  


This next image, of my dog Casey snoozing on the dock, was taken a couple of weeks ago, the day before we closed up the cottage.  Bonnie's challenge for Photo Art Friday was to use her Leafy Landscape texture to create our 'photoartography' (that's my new word for today...Have you read the book Frindle?...just saying...).  I started by adding a gradient map to take the original image to black and white.  After adding the texture, I added a 'sponge' filter and bumped up the hue/saturation levels. 


Notice my signature?  That's another neat trick Kim taught us in Beyond Layers!  And, I just found out that Kim is starting the third session in January!  I highly recommend it if you want to learn more about how to use Photoshop Elements or CS!

These photos are being linked to Our World Tuesday, Texture Tuesday, Sweet Shot Tuesday, Photo Show Off,  This or That Thursdays, Photo Art Friday, Shoot, Edit, Submit, Fabulous Friday, and Photo Friday Link Party.