Showing posts with label Sharpie markers. Show all posts

Friday, March 1, 2013

Finger Painting and Some Inky Text


When I was first watching Joanne's lesson 18 video, I was laughing...yup Joanne, I was one of the ones you were threatening to send to the principal's office. LOL However, seeing as I seldom keep my fingers out of the paint when I do play with acrylics, I thought why not do lettering with my fingers.  And it was fun.  I like the thick rich texture I could achieve.

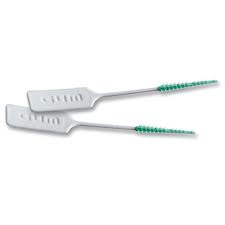
In another couple of lessons, we were exploring different mark making tools.  I used the little Gum dental soft picks as my 'pen' for the page on the left.  I just dipped it into the India ink as needed while I wrote.  It like the control I had with it so that I could write fairly easily while still getting a looser looking text that with a regular pen.

The page on the right was done using the dropper in the India ink bottle.  That was a bit harder to write with, but again it gives an interesting, loose text.

Judging by the watercolour background of the second page, I think I'm finally beginning to get a better feel for leaving some white space as I paint.  I'll need to keep working on that...

Monday, February 11, 2013

Feelin' Groovy...

What a riot!  There's another hour gone...  Sipping my morning coffee, Simon and Garfunkel's 59th Street Band's Feelin' Groovy blaring in the background and armed with my Sharpies, I had a flash back to the late 60's as I played around with lesson 9 in Joanne's online class.  When I finished my name, I decided to cut it out, glue it onto a page prepared with black gesso and then using a white pen I wrote the lyrics to Feelin' Groovy around the outside.  There was still some space left at the sides, so some 'groovy' doodles, made with metalic markers, filled those up nicely.

Tuesday, September 11, 2012

More Faux Tie-dye and Journals

Sadly some sort of a computer glitch has caused all of the images in this post to disappear, and I am unable to correct the problem.  Sorry!
The other day I shared a fun little tutorial about faux tie-dying and I showed you some of the journals I made using my little 'masterpieces'.  Well, yesterday I got the Sharpies out again and I did some more tie-dye circles.  This time I tried using various two and three colour spirals and some other shape and design ideas.  As I suggested in the other post, I recommend that you just experiment and have fun.  I was quite surprised by some of the results.

 I again used some of the circles I made, along with my hand-dyed fabrics to make some more journals.  On this one I used a piece of green ribbon to create a line and then decided to add some thread sketching to turn the circle into a flower.
This journal has wide strips of hand-dyed cheese cloth woven loosely over a plain blue background.  I love how the cheese cloth allows you to see through to the other colour.  Three random tie-dye circles were stitched over top to add a bit more interest.
On this journal I used a piece of accent fabric that I created while doing some surface design (click here to see that post).  I used a couple of pieces of coordinating ribbon and then had fun with some free motion quilting using variegated thread.  I used narrow horizontal zigzag quilting along the right side of the journal cover and then switched to a much longer vertical zigzag to cover the rest of the journal cover, front and back.  I had planned to add a tie-dye circle somewhere on this journal, but once I had this much done I decided to leave it as it was.


Friday, September 7, 2012

Sharpie Faux Tie-dye Tutorial and More Journal Covers

Sadly some sort of a computer glitch has caused all of the images in this post to disappear, and I am unable to correct the problem.  Sorry!

I'd like to share with you a fun faux tie-dying tutorial using Sharpie markers.  You can use this method with t-shirts as indicated on the Sharpie website, but today I'd like to show you another fun use of this method, using cotton fabric (rather than t-shirt jersey).


You'll also need a drinking glass and a straw or eye-dropper.

Step 1:  Cut the cotton up into small squares, slightly larger than the opening of your drinking glass.

Step 2:  Lay a piece of the cotton onto the top of the glass.  You can secure this with an elastic band if you wish, but it's not necessary.

Step 3:  Using a Sharpie marker, draw a few dots in a circular pattern (see first left photo below).

Step 4:  Using another colour of marker, add dots between the first (as illustrated, these can be outside the original circle)


Step 5:  Using the straw or eye-dropper, slowly drip rubbing alcohol, one drop at a time, into the centre of your dots (see photos 2-4 above).  As the alcohol spreads, it causes the marker to bleed and spread.  Stop once you have the look and size you like.

Below I have used a secondary circle of dots outside of the first.  As you can see, once the alcohol reaches this secondary series of dots they too start to bleed and add to the design.


Have fun experimenting with a variety of colour combinations and be ready for some interesting surprises.  The purple in these photos was actually made with the black marker!  Keep in mind that you don't have to limit yourself to circles.  Play and see what happens!
After letting them air dry, I cut the circles out using scissors.  I don't worry about perfectly round circles...I like the more organic look I get when they're a little 'wonky'.

Once I had all of my circles ready, I pulled out some of my hand-dyed fabrics, including cheese cloth, and I made some more journal covers.  

On this journal, I've played with various decorative stitches that my sewing machine is capable of, creating a bit of a grid pattern.


For this one, I started by echo quilting around the 'tie-dyed' circles.  After a few rounds of that, I switched to straight lines of stitches, going horizontally on the bottom half of the journal cover and then doing vertical lines on the top half.


I used hand-dyed cheese cloth on this cover, securing it with a zigzag stitch.  I then added more zigzag stitches to create the subtle lines that echo the shape of the orange cheese cloth.  The circles are secured using more zigzag stitching.


And here's the collection of all three of the new journals.  Thanks so much for visiting today!  If you try this, I'd love to see your creations.  Leave a comment with a link to your blog or Flicker photos so I can see what you come up with!