It's been almost another month, but this piece is finally finished. I showed you the work in progress here and I've finally finished the last bit of hand stitching. I'd love your suggestions for a name...I'm completely at a loss for what to call it.
It's made entirely from my hand dyed and indigo dyed fabrics and threads (except for the machine thread). I love the contrast of the tight machine quilting and the seed stitches on the background piece.
If you've got an idea for a name, please leave your suggestion in the comments. Thanks!
Here are a few detail shots:
Showing posts with label embroidery. Show all posts
Wednesday, May 27, 2015
Monday, January 27, 2014
Blog Hop Featuring Michelle Ward's All New StencilGirl Designs
Today's blog hop is really exciting...the creative team at StencilGirl is creating with brand new stencil designs by Michelle Ward. These stencils are just being made available to you for the first time today and we've been asked to keep them a secret until today's reveal!
Ta da! Here they are...you can click on the images for links if you want to start shopping right now...(I'm thinking all 4 of them would work so well together in some surface design for art quilting!), but...


maybe you'd like to see how I used 'RIPPLES' first (that's the second one in the top row, with the wonderful concentric circles).
I started with a piece of rust dyed fabric that I made several months ago and I traced the entire stencil onto the fabric using pencil. I often 'take stencils apart' and only use bits here and there in my design, but for what I'm planning Michelle's composition is perfect just as it is!
I outlined the pencil lines using three strands of blue DMC floss and a simple running stitch. A finer variegated taupe/blue thread was used to outline the background areas in the same manner.
I filled the background areas using French knots and seed stitches. I switched back to the DMC, this time using a single strand and began filling the circles in with straight stitches. A single strand of a rust coloured floss was used to add additional stitches in the areas between the 'rings'. 
Here are a couple of close ups of the stitching:
I'll back on Wednesday to show you how I used this little six inch piece of stitching. Until then, enjoy the rest of the hop!
Great news...StencilGirl has a giveaway!
All comments left on the hop are eligible for the giveaway so
the more blogs you comment on, the more chances you will have to win.
Have fun and GOOD LUCK!
The giveaway will close on Friday, January 31th at 11:59PM Central Time.
Please note: I have discovered that blogger will only allow/show 200 comments, including my relpies so as much as I love to leave personal thank yous to each of you, I have stopped replying to make sure your comment shows up and therefore gets entered in the draw. Please know I appreciate all of your thoughtful words!
Blog Hop Order
Linda Kittmer-You are here!
Julie Snidle - Hop to see Julie next please...
Friday, October 4, 2013
Time For Some Reworking...
I did this piece several years ago, and just didn't know where to go with it from this. I've never been very happy with it, and the other day I was looking at it and decided it was time to rework it somehow and make something of it. I don't know what that is yet, but the first step is recognizing that it needs "something"!
Saturday, January 19, 2013
Work in Progress
It's been a few days since I've posted so I thought I'd give you a peek at a tiny part of a piece that's a WIP. It's a piece that I'm planning to enter into a juried show in April, so I'll hold off showing you the entire piece (once I finally finish it) until after I find out whether or not it's accepted.
I started by machine needle felting hand dyed scraps of batting with various layers of rovings, hand dyed cheese cloth, yarns and other bits and pieces of fibres. I've added a lot of hand stitching as well as free motion machine work on top. I'm now adding some beading and a whimsical little surprise embellishment. I've been working on this piece, off and on, for two and a half years. I've never considered it a UFO though. It's always been on my mind and sometimes just had to rest for a while as I considered possible next steps.
Wednesday, December 26, 2012
Planets Triptych
This week, I've been finishing another UFO. It's a piece that I started in the summer. I started working on it after seeing a piece that my friend Diana did based on Carol Ann Waugh's Stupendous Stitching. Later, after signing up for Carol's online class, I had set this aside and I did the large colourful piece called Spirals, Lines & Serendipity.In an attempt to finish up yet another of the unfinished pieces that I have lying around (thanks Tracey for your challenge!), I pulled this out and got back to it.
Each of the individual panels are mounted on 8" X 8" canvas squares, and the intension is to hang them vertically as shown here.
I've called it Planets because of the various spheres and the batik patterns on them.
Tuesday, December 18, 2012
Dimensional Exploration
Monday, June 4, 2012
Digitally Altered & Stitched
I used some DMC floss and some hand-dyed threads for both the embroidery stitches and the hand wrapped cords that I made. I decided to create some more dimensionality by attaching the cording in such a way that it lifted up off of the surface.
Thursday, May 3, 2012
Pathways
This was such a fun piece to work on. It started with an interesting piece of handmade paper that was created by wrapping some variagated fuzzy yarn around a frame. The resulting piece of paper was dimensional and had an intriguing lacy texture.
From there I created some beaded lines that I had going in and out of the various holes in the paper. Some additional lines of fabric were included and some accent buttons were added to them.
I wanted an asymmetrical piece, so I added a few more pieces of the hand dyed fabric to create the piece that hangs down from the right side of the finished piece. They were embellished with some accent buttons, coordinating threads and beads. Finally, I added some hand stitching, using hand dyed variegated threads, to create some more pathways as well as added texture using the seed stitch and a few cross stitches on the smaller squares and rectangles.Monday, March 26, 2012
Shadow Play and Beads
Back in the first week of March I showed you the beginnings of this art quilt, before I started the quilting. The next step was to do the free motion machine quilting. There is something very 'zen' about doodling with a sewing machine! In this case, I let the batik drive my stitching design by loosely following the pattern in the batik.
Once I finished the quilting this piece moved from my studio to the family room where I did the beading while 'listening to' TV. I also added a little hand stitch with pearl cotton to give the smaller squares a bit more texture and interest. Again, I used the design in the fabric (that I had fussy cut in the original piecing and fusing stage).
Wednesday, November 30, 2011
Christmas Cards
Yesterday my friend Heather showed me a beautiful hand stitched Christmas tree she had stitched to make into a pin cushion. The idea came from Stitch Magazine. I decided to use the same idea to create a few special Christmas cards. They're quick to make and fit right in to my new personal goal of getting back to working on my art every day. Instead of wasting time in front of the TV, I can accomplish something useful while watching/listening to TV.
The centre card was made using painted Aida cloth. This is a great tip because you can use any acrylic paint and create Aida cloth in virtually any colour to suit your needs.
Friday, September 30, 2011
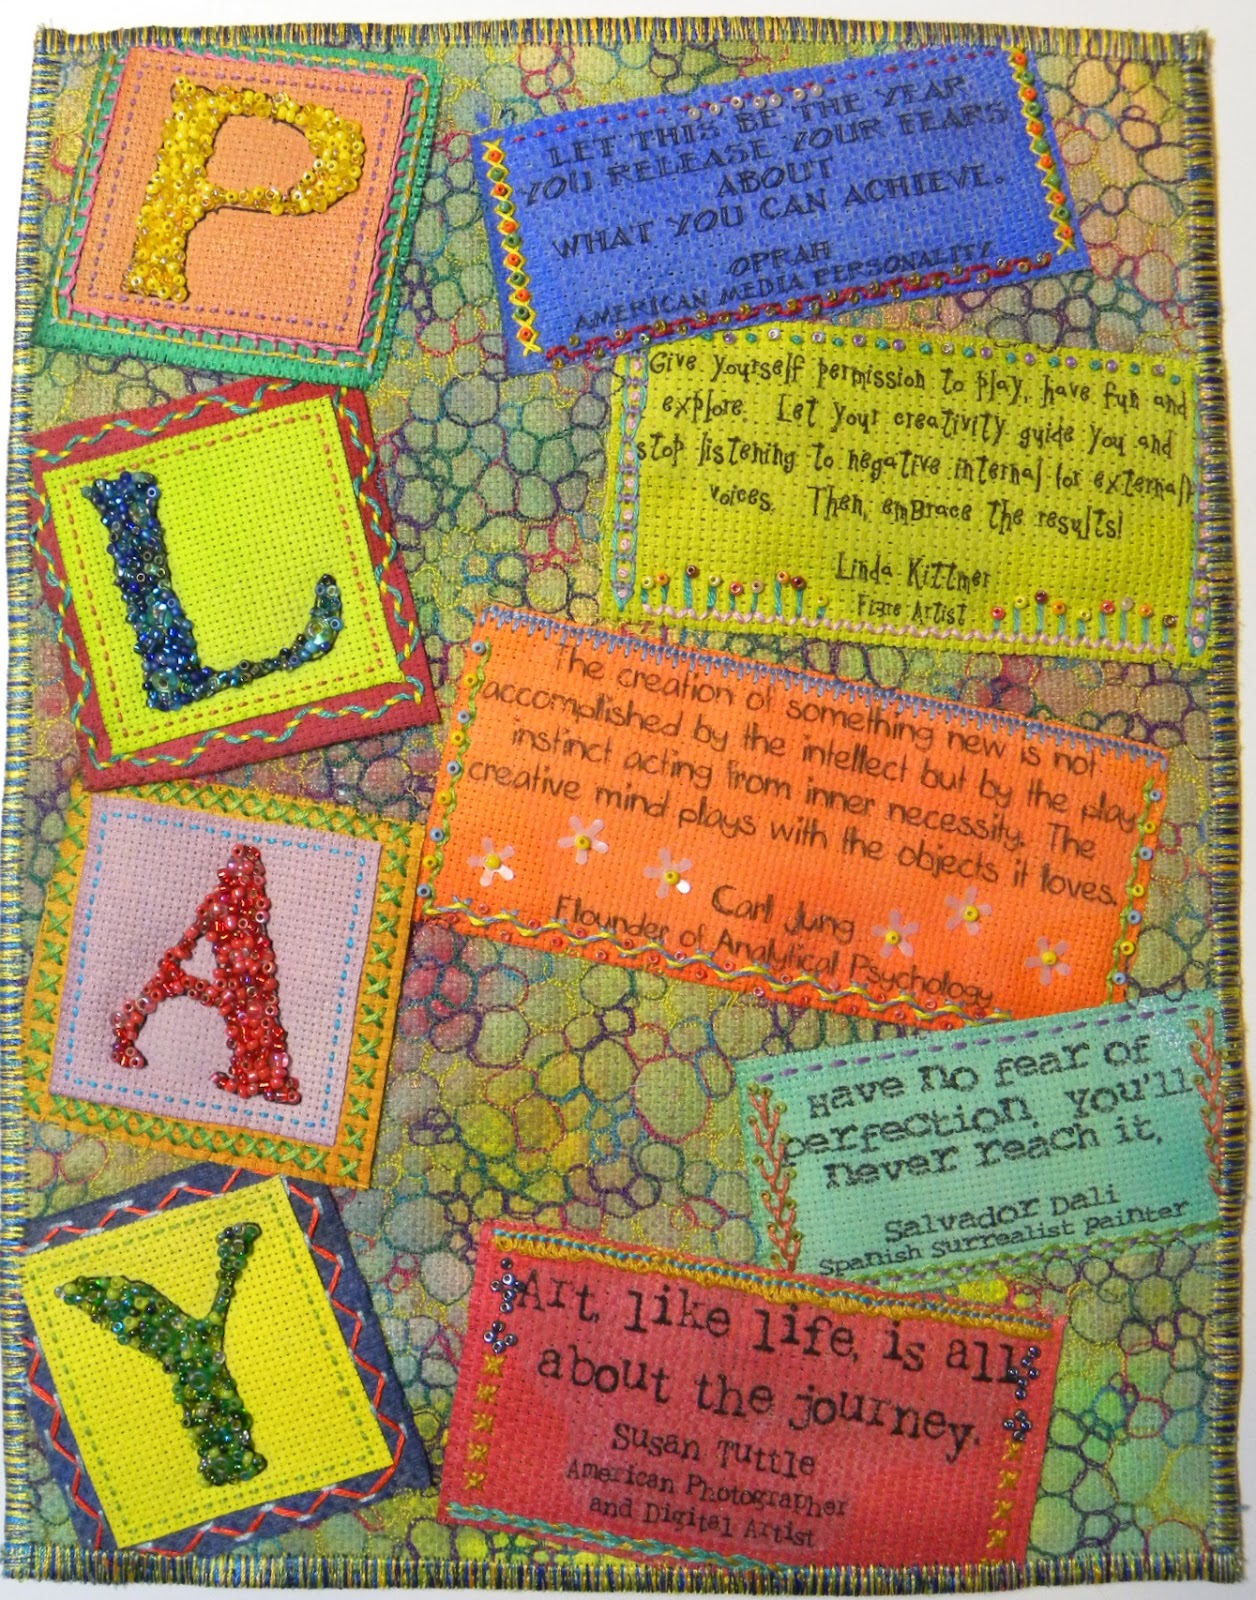
"Play" Published in Quilting Arts Magazine
My philosophy about fibre art is that it's all about playing and having fun. I like to let go of my inhibitions and just enjoy the process. If all goes well I end up with a piece I love, and if not I've learned something in the process.
| close up |
| close up |
Wednesday, September 14, 2011
Summer Garden
I called this piece 'Summer Garden' because of the rows of different textures and colours. It reminded me of when I was a child and my Mom had a big vegetable garden filled with various rows of colourful vegetables.
I loved adding the many different textures using a variety of fabrics, ribbons, yarns, beads and embroidery. I especially had fun doing the row of colonial knots!
The background quilt on which I mounted it is hand dyed fabric that I made this summer while some of my friends were up at the cottage with us. I've quilted it with random diagonal lines using a turquoise metallic thread to give it a bit of sparkle.
Friday, August 12, 2011
Rock, Paper, Scissors
My fibre arts group's latest challenge was to incorporate some small rock pieces that Ann brought back with her from Arizona. In addition to using the rocks in the piece, we had to include the word 'rock' in the title. What immediately came to mind for me was the old game of Rock, Paper, Scissors. Here's the resulting piece.
I first created the background by using my embellisher and adding various scraps of rovings, hand dyed cheese cloth, organza, silk scarves, etc. to a piece of felt. I then wrapped the rocks with copper wire embellished with beads. The large beads are made of various decorative papers and strips of newspaper and some were also wrapped with copper wire. The scissors are were thread sketched onto the background. The piece was finished off with hand wrapped cords, hand embroidery and beading. The final touch was to get out in my kayak and find a piece of driftwood to attach for hanging. I had a lot of fun creating this piece!
Saturday, June 4, 2011
Finally Framed
Tuesday, May 10, 2011
Painted Aida Cloth
Well, after hours of embroidery and some beading, the painted aida cloth piece is almost done. I haven't decided how I will finish it yet. The question is whether to put it into a frame or finish it in another way. I'll have to try a couple of ideas and see what looks best.This could become a new obsession. It's the perfect little project to take along in the car while my husband or son chauffeur me around or to work on while watching (or at least listening to) TV. I've already got a good stash of painted aida cloth from last weekend's playtime in the studio, so I'll be ready to start another one as soon as I get the design planned!
Saturday, April 16, 2011
Wet Felt Study 3
This piece began as another piece of wet felt. I used my embellisher to add a small piece of hand knitting and some swirls of additional wool rovings. Finally, I added the hand embroidery and beading. The ‘binding‘ was created by folding the edges and securing them with the embellisher before adding the stitching. I especially like the way the colours came together in this piece. I don't usually work with pink, but I really like how it worked with the green and blues in this piece.
Sunday, April 10, 2011
Another Felt Piece
I've been playing around with another piece of a wet felted background. I decided to make it a bit more sculptural and then I added a lot of hand embroidery and beading to it. I think it's done for now....
Tuesday, April 5, 2011
Wet Felting Piece is Finished.
Several years ago I was beach combing on the beach at Goderich with my friend Heather. I picked up this wonderful little piece of wood that day and I've had it in a bin in my studio since. Well, it has finally found a new use. I love the way the green felt supports and frames the blue embroidered piece and I think the piece of wood, with it's wonderful, aged grey colour and interesting twist and turns contrasts nicely with the delicate embroidery and beading.
Sunday, April 3, 2011
GOE Challenge
My fibre art group, GOE (Group of Eight) poses various challenges to the members each year. Our current challenge requires us to use a particular piece of fabric and create something that represents the theme "Spring has Sprung". The challenge fabric was about 6 inches square.
My inspiration was a video I watched on making wool felted Easter eggs. Below are some photos of my finished egg from various angles. The beaded quadrants were quilted with a double sewing machine needle, using a green thread and a peach coloured thread. All of the beading and embroidery were done after the egg was assembled and stuffed.
I've included the link for those of you who would like to make one yourself. www.joggles.com/woolfelteastereggs-video.htm
| challenge fabric |
| Top view: 4 quadrants and cord for hanging. |
| Beaded side view. |
| Cross stitched seam. |
| Feather stitch with Colonial knots. |
Monday, March 28, 2011
Thou shalt not covet...unless...
My friend Heather gave me a wonderful piece of silk that she had used to soak up some bits of left over dye. Truth be told, I coveted it when she was showing me a bunch of fabric she had dyed. It has beautiful colours and shapes that just spoke to me! I've decided to start by outlining the shapes I see with pearl cotton and embroidery floss. When I finish doing that, I'll have to decide what to do next. Suggestions are welcome!
Subscribe to:
Posts (Atom)