Showing posts with label art quilt. Show all posts

Monday, December 23, 2013

Holidays Greetings and a Promised Reveal...


Merry Christmas and Happy Holidays to all! Whether you celebrate Christmas, or other festivals of light, either now or at other times of the year, I hope you are enjoying time with family and friends this week and also taking time to be good to yourselves!


As promised, I am sharing the finished the little art quilt, titled "Heartfelt Celebrations", which I started last week. If you're interested, you can see the process I used to make the heart itself in this post here.  I will be sending this little 10" x 7" art quilt to the SAQA 2014 ANNIVERSARY TRUNK SHOW.


To create the background I used the same treated muslin as described in the earlier post.  I then used Neocolor II to create patches of various blues and greens.  I continued layering, using some oil sticks.  I recently discovered Kama Pigment Sticks and I really like how they go on the fabric, as well as some of the fabulous colours they have.

Black text was added using a Traci Bautista Graffiti Glam stamp with StazOn ink.  The remnants of the light blue background, from when I originally made the heart, were torn into thin strips and then machine doodled into place using the same tiny circles, and leaving the frayed edges loose. The final step was to add a bit of black acrylic paint in areas around the edges, as well as under the narrow strips and parts of the heart to create the shadow. And of course, it needed a few dots...alway need a few dots ;o)

I had a lot of fun layering the various elements to create this piece!  This may lead to a bit of a series...


Thursday, December 19, 2013

I'm Featured on StencilGirl Talk Today...

Today, over on StencilGirl Talk, I sharing the beginnings of a new art quilt I have in the works. Here's a little sneak peek...I hope you'll pop on over and see what I'm up to.

Thanks for checking in today!
.

Thursday, May 9, 2013

Pick-Up Sticks...

A while back I posted about some piecing play I was doing by cutting, sewing, cutting again, etc.  The little art quilts that resulted are now finished.  I think all of the free motion lines of stitching really help those colourful stripes to pop.  They are called Pick-Up Sticks I, and Pick-Up Sticks II, respectively.


Friday, May 3, 2013

Xs and Os

On Sunday I posted about a new series I've started, using a consistent 12" x 12" format.     I've finished the first one and my mats arrived in the mail yesterday so it is all matted and ready.  Fortunately this image is true to the actual colour (unlike the previous post).  I've called it Xs and Os because of the circles that I had printed on the denim using my Gelli plate, and the Xs that I stitched into the rust dyed fabric.  I echoed the Os using little round discs (actually the ends of those pre-wound cardboard bobbins...'cause I can't seem to throw anything out. LOL)


I've posted it here without the mat so that you can see a larger image, allowing you to see more detail.


Wednesday, April 3, 2013

Continuing to Make Slow Progress...

As I've been working on my Rust quilt, I'm finding just how much of a challenge it is to machine quilt rust dyed fabric.

I'm making slow progress, but I thought I'd show you a couple of areas that are now done.  I'm really happy with the look I'm achieving, but I can't tell you how many times I've had to rethread the machine because the rust is literally shredding my thread as I sew.


Fortunately I am now moving into some areas which are going to have hand stitching so I'll have a break from the machine work, at least for a while.


I was considering showing you more, but Arbour thinks I should make you wait until it's done...


Monday, March 25, 2013

Spring Is In the Air!

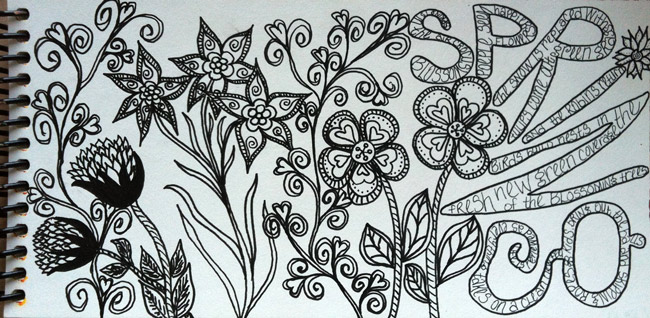
 Last night, while listening to TV I was doodling in one of my art journals, and clearly Spring was on my mind.  I'll probably add some watercolour to this to give it some colour, but today's goal is to keep working on the quilting of my rust dyed piece.  I started working on it briefly last night, as you can see in this photo.

My goal is to finish it this week, but we'll see what other distractions pull me away from it.  Some days I feel like the crow, attracted and/or distracted by anything shiny, but in my case it's anything at all...shiny or not.  Look, there's a distraction now...

Tuesday, March 19, 2013

Starting to Plan...

Back in January, I did some rust dyeing and talked a little about the 'how to' of it all.  Well it's time to get all those fabrics out and start planning the art quilt for which they were made.   

I'm planning to use text on this quilt, as well as a photograph which I took and digitally altered to include a quote.  

There are so many ideas floating around in my head.  Now I just need to harness some of them and get started with the actual piecing...


Sunday, March 10, 2013

Better Than A Groundhog...

Yesterday was a spectacular day...Spring is in the air and the temperature was up around 5ºC so I spent a few hours outside 'strolling' with Casey, our golden retriever.  Casey has always loved playing in snow and burrowing her face in it.  Ever since she was a puppy (she's getting close to 13 yrs. old) she signalled the start of Spring for us by insisting that she walk in/on all of the snowbanks.  Last week she was content to walk on cleared sidewalks, but now she has to have her feet in the snow.  It's as if she knows that it will soon be gone and she has to enjoy every last bit of it. Like I say, she's been doing this since she was a puppy...she's more reliable than the groundhogs as far as I'm concerned!


In addition to spending time outside enjoying the weather, I also worked on this art quilt for a few hours. I'm really pleased with how it is coming along.  You can see I've been sewing the painted Lutradur text onto it, word by word.  I've been working from the bottom and therefore have to recreate the message backwards as I go.  My cat was 'helping' by knocking words to the floor and just generally mixing them up for me, so for the time being she has been banned from the studio.  I'm having enough trouble and have to constantly re-read the statements as I go to ensure they're making sense.


And, as things go, the longer I work at it the less things sound right so I've had to walk away from it for now.

Sunday, January 6, 2013

From Photograph to Art Quilt...a sneak peek...

Back in April of last year, I took a photograph of a monarch butterfly and I digitally altered it in Photoshop.  You can see both the original photo and the altered one by clicking here.

I loved the colours in the altered photo so much that I wanted to use it in an art quilt.  I transfered the photo to fabric, went through my stash of fabrics and selected a number of pieces that I thought would work with it, sketched out a couple of ideas on paper, and then got busy with other things...

Finally, in October I got back to it and actually started working with the fabric and the image.  I wasn't happy with what I was coming up with, so again it was put aside so I could let my ideas 'simmer'.  Then came Tracey's GOE challenge for us to finish a UFO...which I turned into a personal challenge to try to finish all of my UFOs (or at least as many as I possibly could).  I've been working at the quilting of this piece for a few hours today, so I thought I'd give you a little sneak peak.  It still needs a lot more machine work and then some hand stitching, but I'm hoping to have it done by Wednesday evening, when our little group meets.

Wednesday, April 11, 2012

Spring Blossoms Finally Finished


Several weeks ago, while making background papers for some journaling, I posted about the beginnings of these little art quilts. 

I cut very simple shapes to represent the flowers and leaves and used a background of neutral scraps.


Black thread sketching at the machine further defined the flowers, leaves and stems.  This is the stage at which these pieces sat for many weeks as I worked on other projects.  I obviously took these pictures under very different lighting conditions.  The newest photos, showing the finished pieces (below) show the accurate colours.  

I finally got around to quilting the neutral areas and I decided I would mount the pieces onto another simple quilted background.  I started auditioning some backgrounds for these pieces using some of my hand-dyed fabrics and I settled on four different colours. 
Although the photos don't show it well, there are two fairly different blues, as well as the green and the purple. 

Monday, April 2, 2012

European Quilt Art Magazine


I got an email from Gabi Maier today to let me know that the second issue of the new European Quilt Art online magazine is available for reading online or downloading.  The best part is that once you register you'll have free access to this issue of the magazine as well as the first issue.

Check it out at European Quilt Art magazine.  I haven't had a chance to read this issue yet, but I certainly enjoyed the first issue!


Check it out at European Quilt Art magazine.  I haven't had a chance to read this issue yet, but I certainly enjoyed the first issue!

Monday, March 26, 2012

Shadow Play and Beads

Back in the first week of March I showed you the beginnings of this art quilt, before I started the quilting.

The next step was to do the free motion machine quilting.  There is something very 'zen' about doodling with a sewing machine!  In this case, I let the batik drive my stitching design by loosely following the pattern in the batik.

Once I finished the quilting this piece moved from my studio to the family room where I did the beading while 'listening to' TV.  I also added a little hand stitch with pearl cotton to give the smaller squares a bit more texture and interest.  Again, I used the design in the fabric (that I had fussy cut in the original piecing and fusing stage).

Tuesday, January 24, 2012

Valentine Hearts

Valentine Art Quilts  8" x 10"
 Thanks to a recent post by Terri Stegmiller I was inspired to make some little Valentine art quilts.  Terri does have a tutorial if you're interested, but I chose not to use it.  I just don't seem to be able to follow patterns - instead, I tend to look at the picture and then just do my own thing. I probably should have read Terri's tutorial because I think I like her's better, but it was fun playing around in the studio for the afternoon, so what the heck.  

My friend Diane sent me a lovely birthday card and there was a wonderful bonus in that the envelop was made with this wonderful 'love' paper (plain on the outside, but the 'love' text was on the inside).  I took the envelop apart, tore some of it into small bits and added it to the neutral fabric I used for the background.  Thanks Diane :0)

Close up of 'love' paper