Today I'm participating in a blog hop with
StencilGirl and
Foam Board Express.
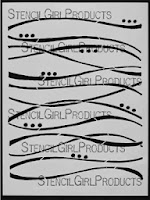
I've been meaning to come up with an organizer for all of my pens, pencils, scissors, etc. that I want to keep easily accessible on my desk so I designed one using foam core board, decorated with
Terri Stegmiller's Waves stencil.
Since I didn't have a sharp blade for my utility knife, I decided to try cutting the foam board with my paper cutter (guillotine). Although it did slightly crush the edge (not visible in the finished project), it gave me a good clean cut and made it fast and easy to get the pieces the size I wanted.
I cut 2 pieces for the sides (11" X 4.5"), 1 piece slightly narrower but the same length (11" X 3.5") for the bottom, and then 5 pieces (4.5" X 3.25") for the sides and inner dividers.
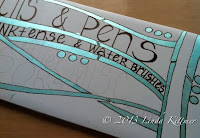
Using a metallic turquoise acrylic paint and a make-up sponge, I stencilled part of the waves stencil onto the front, back and side pieces. I used a 0.8 Micron pen to outline the stencilling and to add some text to the front.
One the decorating was done, it was time to assemble the pieces. I used PVA glue and regular straight pins to put it together. The glue holds it long term, while the pins hold it until the glue dries and then give it a bit more stability (think mini rebar)
I glued the bottom edge of the front piece and then attached it to the edge of the bottom piece so that the side sat flush with the edge of the base. The pins are stuck in through the the base and into the foam of the front piece (be careful to push them in straight so they don't poke through the paper layers). I pin about every inch along the entire edge.
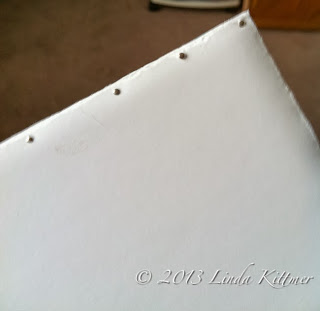
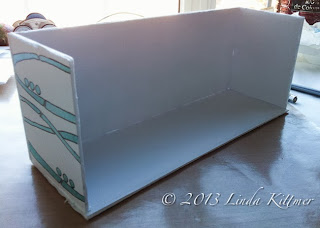
Apply glue to the bottom and front edge of one of the sides. Place flush with the bottom and front pieces, and again pin to secure. If any glue shows, wipe excess away before it dries, to avoid clear lumps of glue (especially on the outside).
You now need to do some measuring and draw a few pencil lines so you'll know where to put the pins for the inner dividers. I made a mark along the edge at 5.5" to mark the centre, and then 2.75" from that centre line, to mark the quarter line. You need to mark these lines on the inside of all three 11" pieces, and on the outside of the base and back pieces.
Draw in the pencil lines along the base, both inside and out, and the inside of the front piece. These lines will allow you to position the dividers accurately, as well as figure out where to put in the pins. Note, I didn't want pins all along the edges in front, so I only pinned the top and bottom and relied on the glue to hold the rest. I did pin from the back all along the edge though since it didn't have the text decorating it.
Once all of the dividers are in and pinned from the bottom as well as anchored at the top and bottom edge of the front, it's time to add the final piece.
Put a bead of glue all along the top and side edges of the dividers and side pieces, as well as along the bottom edge of the back piece. Place it so that it sits on top of the edge of the base and tight against all of the dividers and sides. Making sure that the sides and dividers are covering the lines you drew so that you know they're in the correct position, and then go ahead and pin to secure it all. Once the glue dries it will be good and solid!
And here's what it looks like filled up and in place at the corner of my desk.
After organizing that area of my desk, I decided to make a little divider for one of the cubbies in this shelf. Now instead of a 13" cube, I've got some shelves within it to organize some of the smaller bins and things. Notice I left enough space at the side so the ATC display case can still stand at the side of that space. It was constructed in the same way, using glue and straight pins. By adding a back, although not really necessary, you get that much more stability.
 |
| Before |
 |
| After |
And now, check out these great prizes...
INCREDIBLE PRIZE PACKAGE:
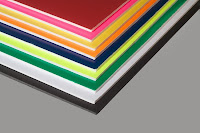
Foam Board Express would like to offer a package of five (5) of its 20-inch by 30-inch flat display foam boards, including one black foam board, one white foam board and three additional foam board sheets in colours chosen by the winner. Colour choices include: green, red, yellow, dark blue, neon yellow, neon orange and neon pink.
and

Mary Beth's new DVD called: StencilGirl Mixed Media Sampler Journal
All comments on all blogs eligible. Combined prize going to one winner.
Don't forget to hop on over to the next stop on the blog hop and leave a comment!
GIVEAWAY (ends Thursday November 14th @ 11:59PM Central Time





 I've been meaning to come up with an organizer for all of my pens, pencils, scissors, etc. that I want to keep easily accessible on my desk so I designed one using foam core board, decorated with Terri Stegmiller's Waves stencil.

 Using a metallic turquoise acrylic paint and a make-up sponge, I stencilled part of the waves stencil onto the front, back and side pieces. I used a 0.8 Micron pen to outline the stencilling and to add some text to the front.


 Foam Board Express would like to offer a package of five (5) of its 20-inch by 30-inch flat display foam boards, including one black foam board, one white foam board and three additional foam board sheets in colours chosen by the winner. Colour choices include: green, red, yellow, dark blue, neon yellow, neon orange and neon pink.
  Mary Beth's new DVD called: StencilGirl Mixed Media Sampler Journal


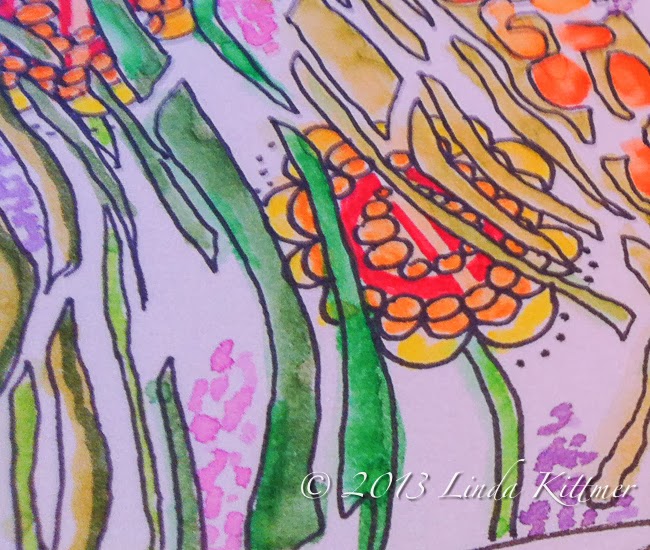
 I started by drawing a simple frame around my journal page with a permanent black pen. Then I started tracing some of the elements of the pods stencil within the border, and sometime allowing parts to extend outside of the border.
 I then penciled in a quote by Henry Ward Beecher about Gratitude...did I mention that was the theme of the hop? I like to pencil in my text before tracing it with permanent pen, just in case I mess up on spacing or such.




 I've finished the hand stitching of the text on this 'Shadow' piece, and I've outlined the shadows themselves with back stitch.
  I had planned to fill in the shadows using tiny running stitches in the traditional Kantha style, but it just doesn't have the impact I want. I think because of the texture of the actual fabric on which I transferred this image, those subtle stitches are lost. I guess my next step will be to pull those stitches out and then figure out what I want to do instead.


