Showing posts with label journal cover. Show all posts

Thursday, May 15, 2014

Bring Back Our Girls...and a give-a-way...

I'm featured over on StencilGirls blog, StencilGirl Talk today, creating journal covers that are made to fit standard composition books. Please come on over and check it out. 
One of the journal covers will be donated to the art auction at http://www.32auctions.com/bringbackourgirls because...


I'm also participating in the #BringBackOurGirls call to artists today to make some artsy noise in support of the right of girls around the world to have an education without fear of violence!


On April 14, nearly 300 girls were abducted from their school in Nigeria simply for pursuing an education. Today marks one month since the kidnapping of those girls!

Today is also the day many artists have come together to help make a difference by drawing attention to this horrendous issue and also by donating art to help raise money.  All of our proceeds with be donated to Girls Rising, to support the worldwide struggle for safe education for all girls and women. 

So please, visit http://www.32auctions.com/bringbackourgirls to buy some art, or make a donation. And please, make some noise to #BringBackOurGirls!

Here's a list of all of the participating artist and their blogsL

Marjie Kemper   http://www.marjiekemper.com
Some people had asked me for a tutorial for making a journal cover, so I have created this PDF which you are welcome to download for personal use.  All I ask is that if you make one you and blog about it, that you link back to this post, telling people where you got the tutorial.  Have fun!

Linda Kittmer's Journal Cover Tutorial


Wednesday, September 11, 2013

Another Journal...

As I may have mentioned in the past, my fibre art group makes journals that we donate to our local women's shelter as a way of giving something back to the community.  Each of us commits to making three journals, so that we can donate a total of 30.  I've made several journals in the last couple of months, but they keep finding homes!  And so I've had to make another one so that I have three ready to go for our deadline this month.

 I used some of my hand dyed fabric, but I wanted to add a bit more of a graphic element so I did some surface design by using Jane Lefazio's Eucalyptus stencil and some acrylic paint.
I love the added texture.  Obviously I was in a circle mood so I cut lots of circles and rings from the fabric.

         
I'm almost sorry that I used this fun piece of a wipe up rag as the lining.  the more I look at it the more I wish I'd used parts of it in a piece of art rather than as a hidden lining!  Oh well, there will be more wipe up rags...


After fusing the circles and rings to the background I did some zig zag top stitching and called it done.


And here's 'Chain Link Journal'.  May it bring hours of drawing, writing, or journalling pleasure to it's new recipient!

Monday, August 12, 2013

A Journal Cover With A Perfect Accent...

I made this journal cover for my sister-in-law using some of my recently dyed indigo fabrics. If you'd like to see how it developed, you can pop over to StencilGirl's blog to see the tutorial.
front
 
back

Sunday, July 21, 2013

Heart Swirl Love...a journal cover tutorial

I'm so excited to have been invited to join the StencilGirl Creative Team!  Today I'm sharing a tutorial over on the StencilGirl Talk Blog on how I make a fun journal cover that slips over a standard sized composition book.  

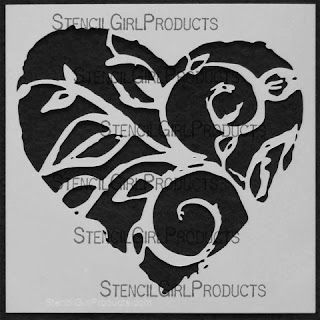
I'll be featuring Margaret Applin's Heart Swirl stencil on the front of the cover, as well as using Trees by Mary Beth Shaw in the background. Don't you just love those wonderful swirls and spirals in that heart!


Here's a bit of a peek...I hope you'll drop by the StencilGirl blog to see more!

Thursday, July 18, 2013

Birch Journal Cover

A while back I made a journal cover and I really liked the process, so I've decided to make more using the same basic technique.

I start with muslin that has been soaked in a 50/50 mixture of PVA glue and water, which gives it nice body and a wrinkled texture. After soaking the fabric, hang it to dry. Once dry, you're ready to start painting.

I use a make-up sponge to add a diluted acrylic paint to create the background.  In this case a sky and grass.


Then I used a StencilGirl stencil called Trees by Mary Beth Shaw. I traced over the outlines with black waterproof pen to highlight the trees and I added in some lines to create the birch bark effect.


The leaves were created using Web by Mary Beth Shaw.


And here's the completed journal cover.  Check back on July 22nd when I'll be doing a detailed tutorial, giving you the measurements  etc. for how to make one of these journal covers yourself.


Friday, June 14, 2013

Some Paint and Finishing...

Today I'm showing you the final steps in the piece I've been working on based on Angie Hughes technique from her book Stitch, Cloth, Paper and Paint (click here and here to see the first steps).  I really enjoyed this process.  Once the gesso was dry, it was time to paint.  As suggested, I used slightly watered down paint to make it easier to get into all of the folds, nooks and crannies in the textured material.  The watered down acrylics also work well to get a little 'drippage' going on!

I managed some right handed painting and
I also did a little 'pinky painting' because I was having trouble achieving what I was trying to do with a paintbrush in my 'wrong' hand. LOL

Notice my rings on my right hand?  I decided to put them on my right hand since it's looking like I won't get them back on my left hand for quite some time.

I also did some stamping with one of my favourite 'found' objects...the empty scotch tape role you can see in this picture.  It gives you two concentric circles and because it's plastic, I've been using it for years!


My plan for this material was to make a journal cover, so the final step was to fold each of the ends in and then do a satin stitch along the top and bottom edges.  This created the 'pockets' into which you tuck the cover of the composition book.  The best thing about this is that when the composition book is full you can easily replace it with another one!  I even "put a bird on it" with my fun little stamp.