

Showing posts with label doodles. Show all posts
Showing posts with label doodles. Show all posts
Tuesday, June 16, 2015
DLP Week 23: Travel Inspired...
The week 23 DLP theme is about travel, with a "Take me away" prompt, so I just had to create a page about my upcoming trip to Amorgos Island in Greece!


Monday, March 16, 2015
DLP Week 10: Make Your Mark

I've got no process or description this week, just the spread as it stands on it's own, intentionally 'scratchy' and quick.
As always, it's not too late to join the FREE Documented Life Project fun!
Tuesday, March 10, 2015
DLP Week 9: Give Me A High Five

I started by using some torn pieces of Gelli prints, collaged on the page. Theoretically I guess that's only one layer, yet the Gelli prints already have multiple layers of texture created with various found objects.

Then, using black and white Signo pens I added some doodles and drew a couple of silly characters. In hindsight I should have drawn an odd number but, oh well ;o)
Finally I used some Copic markers to add some colour to the two 'ladies'.

Wednesday, February 5, 2014
January Complete...February Spread Ready to Go...
 I've finished all of the little vignettes in my January calendar and I've got February set up and I've started to fill in the first few days.
 My February dailies are going to be black and white sketches and or text so that the only colour on the page will be the various pinks, reds and purples that you see now.

Friday, January 24, 2014
Drawings and Doodles...
 I've been doing a lot of drawings and doodles in my 2014 art journal and I'm loving it. I feel like I'm starting to find my drawing style and I'm becoming more confident in my hand drawn lettering too! Thanks to the great inspiration from Joanne Sharpe, I'm learning some great, and manageable ways to record the highlights of my year. They say a picture is worth a thousand words...well, I think doing these little 'dailies' and vignettes as tiny drawings is more my style than just writing!


I'll show you these again once I get them all coloured. I'm planning to use my Tombow markers and a water brush to get a pretty watercolour effect. We'll see if I achieve what I'm picturing in my mind... ;o)
Friday, November 8, 2013
A Blog Hop Featuring StencilGirl Stencils Designed by Jane LaFazio...
 |
| Eucalyptus |
 |
| Pods |

 I started by drawing a simple frame around my journal page with a permanent black pen. Then I started tracing some of the elements of the pods stencil within the border, and sometime allowing parts to extend outside of the border.
 I then penciled in a quote by Henry Ward Beecher about Gratitude...did I mention that was the theme of the hop? I like to pencil in my text before tracing it with permanent pen, just in case I mess up on spacing or such.

Using my Tombow markers, I added colour. On the stencilled areas, I brushed in colour (using the brush end) right on the page. For other areas I put down some colour on the stencil plastic and then add a drop of water with the water brush before laying it down on the page.


I used this technique for the blue background areas as well as the little dotted flowers seen in this next image.
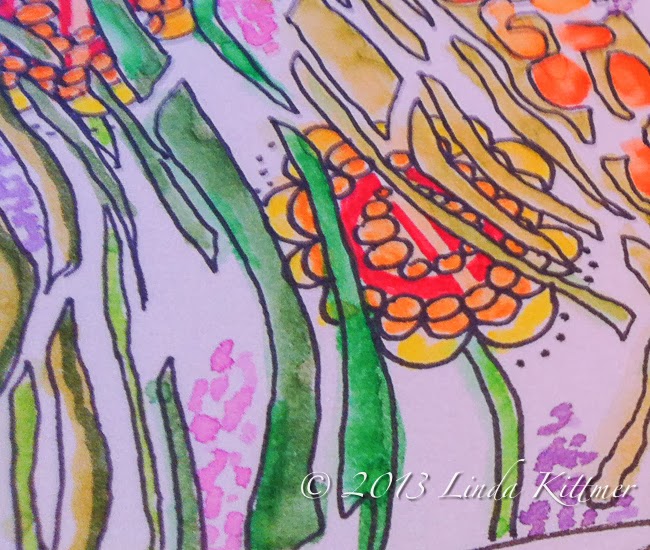
I also used the water brush to activate the Tombow colours in the stencil areas to achieve the watercolour effect.

And here's the finished page (And yes, I'm also grateful for being able to ignore the drab November weather and create colourful gardens any time of year!):

StencilGirl Products is giving away a prize on their blog StencilGirl Talk. ALL comments left on ALL blogs are eligible to win. The more blogs you leave comments on, the more chances you will have to be the lucky winner!
The giveaway will close on Monday, November 11, 2013 @ 11:59 PM Central Time.
Here's the Blog Hop order...happy hopping!
Linda Kittmer-You are here.
Jenny Lee Cochran-Hop on over here next!
Wednesday, February 20, 2013
Art Tags...a Little Something from Nothing
 When I'm working with either watercolour or acrylic paint these days, I like to keep a couple of blank tags on my desk. Instead of wasting the paint that's on my brush when I want to change colours, I doodle with the brush on one or both of the tags to use up as much of the paint as I can. I end up with some interesting backgrounds and then later, I can add some doodles and lettering with a black pen to finish the tag.
This first tag was made using Twinkling H2Os or Twinks as they're often called. I was working on some of the pieces I started on Saturday night.
I've also been playing around with writing with my glue gun (a lesson in the Letter Love 201 class). I had a package of sparkly glue sticks in gold, silver, red, blue and green, so I thought I'd see what the gold and silver looked like using this technique. I must say, I think I prefer the control I get from the dimensional Pearl Pens, and they seem to result in a very similar look, but the one neat thing the glue gun lets you do is create a dimensional word on your not stick mat and then pick it up and use it as an embellishment on another piece. The Pearl Pens may work for this too, but I'll have to experiment to be sure. The glue gun glue certainly dries quickly which is a real bonus!
 While painting some of these with Silks acrylic glaze, I was again cleaning my paintbrush on a couple of blank tags. You can see the painted tags on the right of this shot.
 After doing some sewing, I went back and added some doodles to the tags using Pitt pens in black and silver, and a white Signo pen. So far, I think I'm liking these tags more than the glue gun words, but I'll have to reserve judgement until I figure out how I'm going to use them in an art journal page.
And finally, here's a page I created using one of the glue gun words. I did the word on a navy blue card stock and then lay it over the white journal page before spraying it with a copper Perfect Pearls mist. I then moved the dark card stock out of the way and sprayed some bright yellow Dylusions ink onto the page. I off set the card stock so that it would give me a bit of a bright highlight along the lower edge and to the right. I added a quote in that space. Finally I used a star shaped hole punch to cut the stars in the card stock and then I glued them randomly around on the yellow paper. I found that the gold glue gun glue didn't show up as well as I hoped so I added a bit of a highlight using the white Signo pen. It actually stands out quite well but I couldn't seem to get a good shot that does it justice.

Subscribe to:
Posts (Atom)