Showing posts with label Silks Acrylic Glaze. Show all posts

Monday, April 20, 2015

DLP Week 15: Cry Me a River...

I just love how some art journal pages evolve, almost on their own.

For this week's Documented Life Project challenge, we were to use acrylic paint (a go to of mine when it comes to art journalling) and the quote "Cry me a river".

I started by tearing up some 'under paper' that I had on my desktop, and those colours led me to randomly paint the journal page using Key Lime and Teal Zircon Silks acrylic glaze. I love the intense colours and that subtle sparkle you get with Silks!


I collaged those torn bits of under paper onto the painted page, and in the process I discovered that the glue I was using, when dried and rubbed off with my finger caused an interesting lighter marked area on the page.


I liked that effect so I started making glue circles in a slight arc near the top of the page.

After the glue had some time to dry a bit, I wiped the excess off leaving the circles you see. I added a bunch of doodles to the collaged papers and circles and then I started searching on Pinterest for quotes that related to the challenge quote (I didn't want to use the quote given, but wanted to find something that related to it).

I found this quote:

Cry a river.
Build a bridge.
Get over it.

That immediately had me seeing the collaged papers as pillars and the circles as the linking bridge...

        ...a few more words and an arrow and I was done!


Monday, March 31, 2014

Another StencilGirl Blog Hop Featuring Newly Released Designs by Andrea Matus deMeng...

I'm excited to be participating in this blog hop in which we're featuring these newly released stencils from the talented Andrea Matus deMeng. I first saw these stunning designs a couple of weeks ago, and it's been really hard to keep them a secret until today's unveiling!

I'm lucky enough to be able to use this beautiful design, called Precocious Peony today. 

I'm experimenting with a technique, based on a piece of art I saw a couple of years ago.  Sadly, I can't remember where I saw it and I don't really know how it was made, but I know the final piece had Silks Acrylic Glaze painted onto black gesso.  Based on what I remembered, and some things I found in my husbands workshop, I decided to experiment and see what I could come up with.  Happily the end result turned out alright so I'm able to share it with you!

If you want to try this, you'll need:

-drywall compound
-a piece of wood (or other sturdy material) cut to the finished size you desire. 
-a putty knife
-sandpaper
-something pointy with which to 'draw' (I'm using a seam ripper, but a ballpoint pen, an awl or a stiff piece of wire will work.)
-black gesso
-Silks Acrylic Glaze
-paint brushes (a sponge brush for the gesso and smaller paintbrushes for the Silks)
-a water jar for cleaning brushes
-Golden Self Levelling Clear Gel
-patience...because this has to be done over a couple of days!

Step 1:

Sand the surface of your wood to roughen it up a bit so the drywall compound with stick well.

Step 2:

Read this whole step before starting...Mix up a small amount of drywall compound to a nice spreadable consistency, but not too runny. (I only mix enough for each thin layer each time). Using the putty knife, spread a thin layer of the drywall compound onto the piece of wood, keeping it as smooth and even as you can so that the entire surface is covered. Let dry completely-my drywall compound says it is dry in 45 minutes but some take longer so read the package (this is where the patience comes in...not my strong suit!). 

While that's drying, scrape any excess compound into the garbage and wash the container and putty knife with water. 

Repeat this step several times until you have about a 1/4" - 3/8" layer of compound. It is better to add thin layers many times to avoid cracking. (See what I mean about needing patience!). 


Step 3: 

Using sandpaper, sand* the final dry surface of the drywall compound until it is completely flat and smooth. Sand the sides of the block too, to get any little bits of drywall compound that may have got on them. (You can see from the image on the left that my 'before' was not terribly smooth but it still sanded up beautifully).

*Drywall dust is messy, so do this outside if possible.


Step 4:

Position your stencil onto the surface, and using your pointy 'drawing' tool etch the design into the surface of the drywall compound. Consider flipping your stencil over to give you another variation of the design. You can add any additional drawing/doodling you wish by etching into the surface.  


Step 5:

Paint the entire surface and the sides with black gesso, ensuring you get into the grooves you created while 'drawing' but without filling those grooves up with excess gesso.  A sponge brush works great for this because you can dip the pointy edge into the groove to soak up the excess gesso. Let dry completely (there's that need for patience again...)


Step 6:

Using the small paintbrushes and the Silks, paint your design however you like. Notice I took the design over the edge with the paint.


Step 7:

Wait...more patience...According to the jar, Silks required 48hrs to fully cure so go find something else to do for the next couple of days!

Step 8:

Add a layer of the Golden Self Levelling Gel to the top and sides of the painting.  I set mine up on another jar of Golden product to elevate it up off the table while I added the layer of gel and let it dry.


Step 9:

Sit back and admire your handiwork!  


Great news...StencilGirl has a giveaway! 

Two winners: one will receive a set of the new 6"x 6" stencils 
and one will receive a set of the new 9" x 12"

All comments left on the hop are eligible for the giveaway so 
the more blogs you comment on, the more chances you will have to win. 
Have fun and GOOD LUCK!

The giveaway will close on Sunday, April 6th at 11:59PM Central Time. 

Please Note: Although this is considered a one day hop, 
you have the ENTIRE week to comment to win the prize.

Note about replies during blog hops: Blogger seems to cut me off at a certain number of replies (no sure how many) and then stops letting me post comments from you. Since I want anyone to have a chance to win the giveaway prizes,  I have decided to only reply if someone asks a direct question.  
Please know that all of your comments are much appreciated.  I do read them all, and I thank you for all of your kind and thoughtful words!

Blog Hop Order

Linda Kittmer- You are here
Carolyn Dube-Your next stop...

Monday, February 24, 2014

StencilGirl Blog Hop Featuring Walnut Hollow...

Today I'm playing along in another StencilGirl blog hop, this time featuring a wonderful cornice box from Walnut Hollow.

Before I show you what I made, let me share a quick story... 

A few years ago I made a really cool sign (in my opinion) for our cottage.  I used a wood-burning tool to trace over our name and some of the details and then I used some acrylic paint and some fabric to enhance the design.  Sadly, I didn't take any pictures...I know, what was I thinking!...and even though I used marine varnish on it, it only stood up for a couple of years before the fabric started to fade. The black border you see here was originally done in 1" squares of colourful batiks and the letters in our last name were also done in batiks, with a narrow white border left around them.   I've redone it, this time using only acrylic paint so hopefully it holds up better in the elements.

Well, a while back Mary Beth Shaw sent me her latest book, StencilGirl Mixed Media Techniques for Making and Using Stencils and inside it was a project she did using a wood-burning tool.  That got me thinking that I haven't played with mine for a while, so I thought, what better project than a wooden box from Walnut Hollow to get that wood-burning tool back out for some fun!

As I mentioned, I'm using this beautiful cornice box from Walnut Hollow (Dimensions: 3.36" x 11.96" x 9.19").  It's a wonderful size and when finished and lined with some fabric, will make a beautiful keepsake or jewellery box!

I chose to use Jamie Fingal's stencils Zen Landscape and Houses stencils for my design on the top of the box.


I first drew a pencil frame around the top of the box, and then I used the Zen Landscape stencil to create an interesting hilly setting.  Because the box is wider than the stencil, I had to move the stencil around to create the initial wavy path, sometimes drawing in bits to make it work.  In the area under the path I used random parts of the stencil to fill in the area, again drawing some similar shapes myself to fill in all the areas.

I chose one of the houses from the Houses stencil and added it, along with it's funky tree in the little valley created by the path.  Again I took a bit of liberty to draw bits to make it work for me.  I also drew in the little walkway up to the front door. 


Now the fun begins...I plugged in the wood-burning tool and started to trace all of my pencil lines.  This was a great activity to do while watching the Olympics!  You don't have to worry about your pencil lines because they all disappear as you go.  However, if you are a little off with your wood burning, you can always go back and erase the pencil lines later.


Although I was very happy with how it was looking, I thought it needed some of the wood burned design on the sides too, so I drew in the random little rectangular shapes all the way around the box on the lid portion of the sides.  I varied the height to better echo the elements from Jamie's stencil.

Here's what it looked like after all of the wood burning was finished.

I used Silks acrylic glaze and some Byzantia metalic paint.  The Silks allow some of the wood grain to show through, and both give a lovely lustre to the piece. When watered down slightly, it acts like a beautiful stain for the background areas.


The final step was to mix a bit of the turquoise with water to stain the  'frame' on the lid, as well as the remaining parts of the sides of the box.


Great news...StencilGirl and Walnut Hollow  

have giveaways for you! 

All comments left on the hop are eligible for the giveaway so 
the more blogs you comment on, the more chances you will have to win. 
Have fun and GOOD LUCK!


The giveaway will close on Sunday, March 2nd at 11:59PM Central Time. 

Blog Hop Order
Linda Kittmer-You are here!
Mary C. Nasser-next stop...

Saturday, March 9, 2013

Playing with Texture in Lettering...

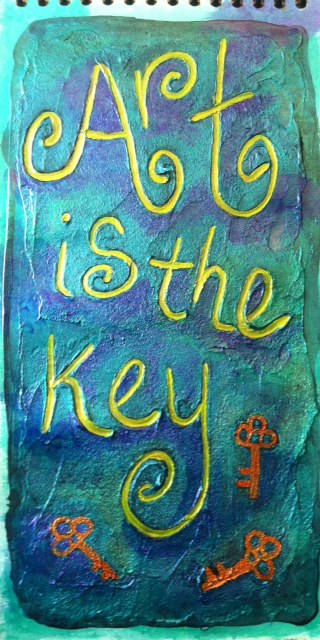
Sparked by another couple of lessons in Letter Love 201, I've been playing with texture in lettering.  Joanne had suggested an idea using heavy body paint, but instead mixed some black gesso with Golden Fiber Paste and wrote in it while it was still wet.  When it dried, I painted it using Silks Glazes.  I love the way the Silks work on black!   The close up gives a better view of the texture and depth of the lettering.  I used a rubber stamp of a key to stamp into the wet paste and gesso, but it isn't as deep as the lettering.


This piece is the favourite of a number of pieces I created using matte medium and Dylusions spray inks.  I'll end up using them as embellishments on journal pages at some point.

Wednesday, February 20, 2013

Art Tags...a Little Something from Nothing


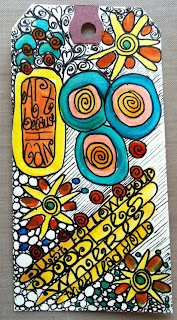
When I'm working with either watercolour or acrylic paint these days, I like to keep a couple of blank tags on my desk.  Instead of wasting the paint that's on my brush when I want to change colours, I doodle with the brush on one or both of the tags to use up as much of the paint as I can.  I end up with some interesting backgrounds and then later, I can add some doodles and lettering with a black pen to finish the tag.

This first tag was made using Twinkling H2Os or Twinks as they're often called.  I was working on some of the pieces I started on Saturday night.

I've also been playing around with writing with my glue gun (a lesson in the Letter Love 201 class).  I had a package of sparkly glue sticks in gold, silver, red, blue and green, so I thought I'd see what the gold and silver looked like using this technique.  I must say, I think I prefer the control I get from the dimensional Pearl Pens, and they seem to result in a very similar look, but the one neat thing the glue gun lets you do is create a dimensional word on your not stick mat and then pick it up and use it as an embellishment on another piece.  The Pearl Pens may work for this too, but I'll have to experiment to be sure.  The glue gun glue certainly dries quickly which is a real bonus!

While painting some of these with Silks acrylic glaze, I was again cleaning my paintbrush on a couple of blank tags.  You can see the painted tags on the right of this shot.

After doing some sewing, I went back and added some doodles to the tags using Pitt pens in black and silver, and a white Signo pen.  So far, I think I'm liking these tags more than the glue gun words, but I'll have to reserve judgement until I figure out how I'm going to use them in an art journal page.

And finally, here's a page I created using one of the glue gun words.  I did the word on a navy blue card stock and then lay it over the white journal page before spraying it with a copper Perfect Pearls mist.  I then moved the dark card stock out of the way and sprayed some bright yellow Dylusions ink onto the page.  I off set the card stock so that it would give me a bit of a bright highlight along the lower edge and to the right.  I added a quote in that space.  Finally I used a star shaped hole punch to cut the stars in the card stock and then I glued them randomly around on the yellow paper.  I found that the gold glue gun glue didn't show up as well as I hoped so I added a bit of a highlight using the white Signo pen. It actually stands out quite well but I couldn't seem to get a good shot that does it justice.


Tuesday, January 1, 2013

Art Journal Calendar Cover

Last night, in the early evening, I finished the front cover of my Art Journal Calendar.  To quote Karen Ellis, it was in it's "ugly stage" for quite a while.  In fact, I'm not sure it came out the other side completely. LOL

Watching Karen work (you can watch some of her Ustream TV recording or watch her live on Friday evenings), I have learned that art often goes through an "ugly stage" before you get to where you want to go.  I used to panic and quit at the ugly stage but thanks to Karen I've learned to work through it and usually I can get to where I'm happy with the piece.

I started by putting gesso on the printed front cover of the journal to cover up the commercial cover and then I rescued an old map that my husband found while cleaning out the basement.  He was about to throw it in the recycling bin but my idea of recycling maps and his differ some what (he has now been educated and will save maps for me!).
That got a few layers of paint and some spray ink using various stencils, as well as a couple of strips of text printed gaffer tape down the front edge and beside the spiral binding.
 I didn't take pictures while I was in the really ugly stages...I think I was too lost in thought on how I was going to rescue it...

I used a Dylusions stencil with random dots on it  and some course moulding paste to add some real texture along with the perceived texture of the various layers of paint and ink.

Anyway, for this cover, I wanted to play with a bit more of a grungy look and I'm not sure I love it, but it told me it was done so I have put down the paint and backed away...

Monday, February 13, 2012

Going Around in Circles

Today, again thanks to the Letter Love 101 online class, I've been playing around (pun intended, LOL) with journaling in circles.  I did a few practice circles, to create a page in my practice journal so that I could add notes to remember what I've learned and jot down some ideas for use in the future.  

Click on photo to see a larger image.
I did this first one on one of the extra pages from an altered book I did a while ago.  I like the extra layer that the text provides, but it was not ideal when using the Silks acrylic glaze because I was using a lot of water and the paper wanted to curl up.  It dried fine, but was a bit tricky to work with.  I might use a very light coat of gesso in future (as I did in the altered book) so that the text still shows through but any paint would have a primed surface.  I recently won the Silks Acrylic Glaze by leaving a comment on Luminart's blog - lucky me :0).  Coincidentally they posted a great video today showing Twinkling H2Os (might need to get me some of those!) and the new Silks.

The next two circle journals were done on bristol board using Copic markers to add some colour.  I experimented with black text, anding some pops of colour, as well as coloured text.  I did add a layer of the Silks in a golden colour (it's called Ginger Peach - don't you love that name?)


 As you can see in the page layout in my practice journal, I made a couple of others too and then I glued them in and added my notes around them.


After all the practise, it was time to use my new found skills.  My husband and I had a good laugh over my choice of words since I am not into shoes at all.  However, I thought it would be fun to draw and then the words just came.