Showing posts with label Carolyn Dube. Show all posts

Wednesday, May 7, 2014

Fun Found Items...

The other day I was going through some things and I found a bag of goodies that my friend Jan gave me at a Christmas get together.  Inside was this package of Scratch to Draw paper.


I reached for my high tech tweezers, usually reserved for fine manipulation of tiny things...but they were the first pointy item I got my hands on and I knew they'd be great for scratching into the paper (they stick mentioned on the package seems to have gone missing!).


I used Carolyn Dube's buildings stencil because it has a nice variety of interesting blocks. I was thrilled with the bright colour and the effect of the tweezers scratching into the black looked great (in my humble opinion LOL).
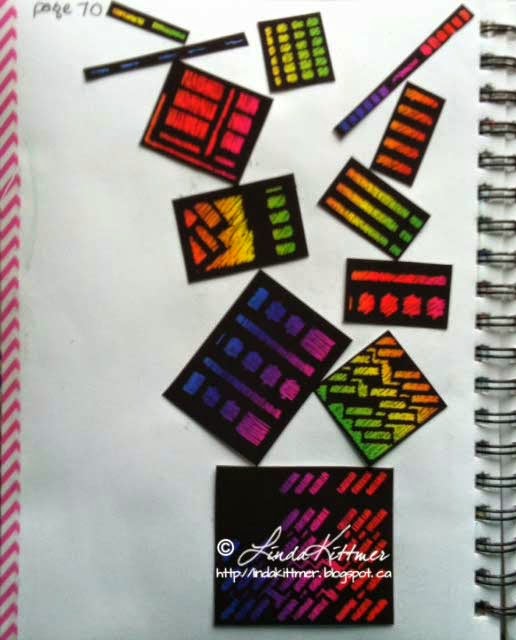

 I made a variety of different sized 'building blocks' :o) and then stacked them in a finely balanced arrangement.  I played with various background ideas, but in the end I decided that I liked the contrast of the blocks on the white page so I left it as is.


I added some text, a bit of shading and a simple doodled border and called it done!


Friday, March 28, 2014

I'm Featured on StencilGirl Talk Today...

I'm featured over on StencilGirl Talk today.  I'm creating a journal page using Carolyn Dube's Use Your Words stencil.  Here's a bit of a peak at what I'm doing...come on over to see more!

Wednesday, February 26, 2014

Doodling and Exploring a New Technique...

A little while ago I watched a YouTube video done by my friend Carolyn Dube, in which she used pan pastels and stencils to create a journal page. It looked like a lot of fun, and I needed a quick 'art play' so I gave it a try. I used my Stencilgirl peacock feather stencil, designed by Kae Pea along with colours that you'd expect to see in real peacock feathers.  I just love those colours!
I wanted a really soft, almost slightly blurred background so I used a very soft brush to gently brush over the page, pulling out from the core of the feathers. I probably should have stopped here since I love this...but I didn't...

I then grabbed the stencil and a permanent black pen and I traced the stencil a few times, filling it in with little cross hatch marks.


At this point I added my text and then put another feather up at the top, this time using only part of the feather.  Random swirls and dots filled in some of the border areas before I did a bit of journalling in the space under the two feature feathers.

I'm not sure why I had such a hard time getting good photos of this page, but the black is really dark (unlike the deep grey that you're seeing in these images).

The end result isn't as wonderful as the vision in my head was, and I sort of wish I hadn't covered up that beautiful background.  Oh well, I know how to recreate it!