Saturday, March 31, 2012

If I Were Half My Age...

Wouldn't it be fun to design and wear a wonderful steampunk creation?

The current challenge for my fibre art group, GOE, is 'steampunk'.  I don't often pull out my sketchpad to design my fibre art pieces (I tend to work more intuitively and let the pieces lead me where they may), but for this piece I started by designing the steampunk dress on paper.  Once I had the drawing of the dress I started gathering my materials and the real fun began.

Thanks to my husband's generosity, I was able to cut into a really old leather jacket that he had finally stopped wearing because of all of the holes he'd worn into it.  Although I was reluctant to cut into it (I loved the old worn look of it) I did realize that he was starting to look like a street person when he wore it. LOL  The brown bodice of the dress as well as the black band across the background both came from that wonderful jacket.  The black part is the cuff, complete with the snap closure.  The zipper that finishes the upper edges was also from that jacket.  I used little scrapbooking eyelets to be able to lace the bodice of the dress.

Because of the weight of all of the leather, gears and other materials, I actually had to reinforce the back of this piece with a 1"x 2" piece of wood across the width so that it would hang without drooping into itself.
The background fabrics in the piece are my own original designs too.  The top piece was photo transferred using a copyright free image and TAP and the bottom piece was created using tissue paper, foil and organza.  This piece was left over from a box I made last year.

And the winner is...

Wow, the odds for this one were great.  Only four people left comments, and the lucky winner of the My Memories Suite software is:

Ruthanne

Congratulations Ruthanne.  Please send me an email with your contact info. and I'll get the download code out to you.

Friday, March 30, 2012

Creating Subtle Frames

After watching Kim Klassen's latest video tutorial in Beyond Layers, I've been experimenting with creating subtle frames around photos.  In the past I've achieved this look with a few of Kim's textures, which have the frame already 'built in' for lack of a better term, but using the new skills I've learned, I can now add frames to any photo, regardless of the textures I apply (if I apply one at all).  [BTW, Kim's starting a second round of Beyond Layers on April 16th if you're interested in signing up.]

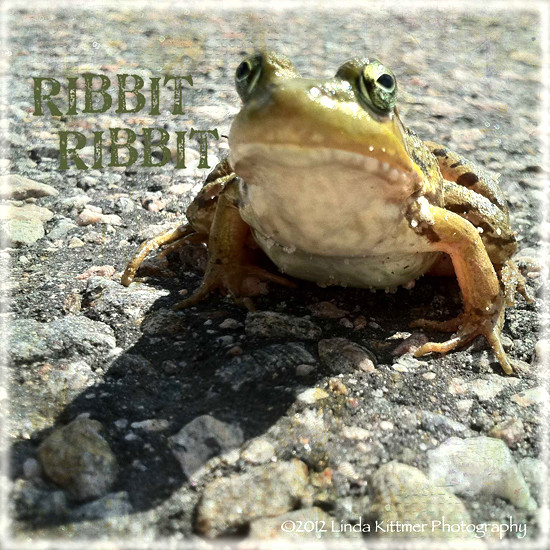
This first photo is of a frog I met while cycling last summer (he's also featured in my blog banner).  It's a good thing he was on a very quiet country road, because I got down on my knees and had my iPhone right on the road to take this shot. :o)  After I photographed him I moved him to the side of the road (beside the river that I hoped he was trying to get to).

Mouse over photo to see the 'before' image.
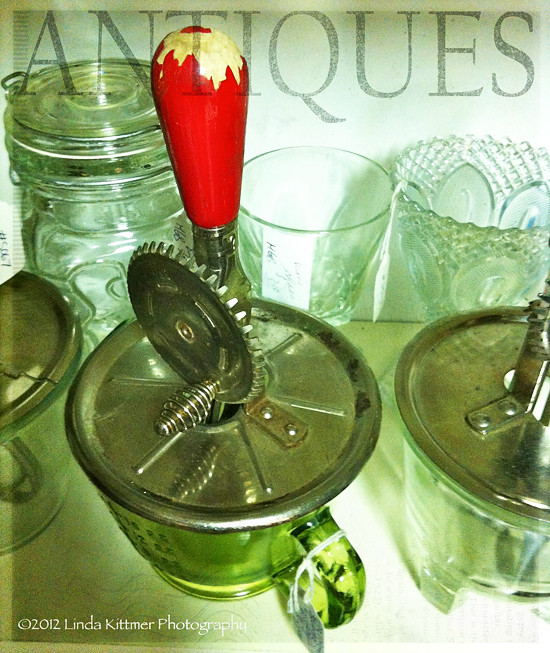
This second image was taken in an antique market.  What a great place to wander about and take pictures!

Mouse over photo to see the 'before' image.
Thanks for stopping by today.

Tuesday, March 27, 2012

Texture Tuesday: Pink

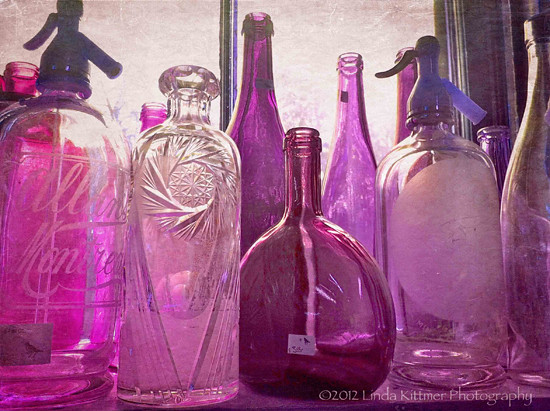
For this weeks Texture Tuesday photo, I was having some fun playing with hue/saturation.  The theme was pink and I didn't have a great subject for pink, but I had just taken this photo of old bottles and I just love them.  Although their original colour is wonderful, I decided to play with them and make them fit the 'pink' theme.  :o)

Mouse over photo to see the 'before' image.
After doing the hue/saturation adjustments, and a bit of a levels adjustment, I added Kim's 'dustyrose' texture a couple of times (see to the left for blend modes and opacity).  What better than a pink texture to work into this week's theme!

If you haven't signed up for Kim Klassen's "Texture Lovin' List" yet, what are you waiting for?  Kim generously provides download links to wonderful and free textures every week!  Just click here and sign up (the box is near the top right of the page).

Monday, March 26, 2012

Shadow Play and Beads

Back in the first week of March I showed you the beginnings of this art quilt, before I started the quilting.

The next step was to do the free motion machine quilting.  There is something very 'zen' about doodling with a sewing machine!  In this case, I let the batik drive my stitching design by loosely following the pattern in the batik.

Once I finished the quilting this piece moved from my studio to the family room where I did the beading while 'listening to' TV.  I also added a little hand stitch with pearl cotton to give the smaller squares a bit more texture and interest.  Again, I used the design in the fabric (that I had fussy cut in the original piecing and fusing stage).

Sunday, March 25, 2012

And The Winner Is...

 The lucky winner of Lyric Kinard's DVD Bead It Like You Mean It is...

(please use your imagination to hear the drum roll...)


  Robbie!
Congratulations Robbie.  Please contact me via email to send me your mailing address and we'll get the DVD out to you.  If you were not the lucky winner, you can click here to purchase this wonderful DVD.

Thanks for dropping by today.

Tuesday, March 20, 2012

Beautiful Black and White

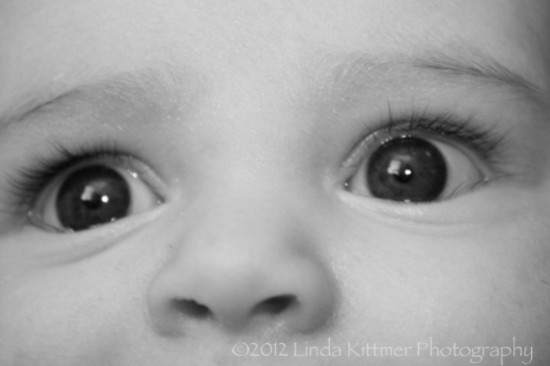
My niece has the most incredible black and white portraits of her children hanging over the fireplace in her living room.  They are large close-up images of their faces, and they totally capture the character of each child.  This week's challenge in Beyond Layers is to explore black and white photography so I've taken a couple of photos and using Photoshop, I've transformed them to black and white.

This first one is a close up of my youngest great niece's face, focusing on her bright, beautiful eyes:

Mouse over photo to see the 'before' image.

This next one is me, taken while skiing:

Mouse over photo to see the 'before' image.

Monday, March 19, 2012

Great Beading DVD Give-Away

 Computer gremlins have caused the images in this post to disappear.  Sorry!

If you've seen some of my heavily encrusted beaded pieces of art, you'll know that I'm a bit addicted to beads (and if you haven't, click on the BJP 2012 tab at the top of the page).  When I first decided to join the Bead Journal Project back in December, I treated myself to a copy of Lyric Kinard's Bead It Like You Mean It DVD so I could get some more information and inspiration.  I am a self taught beader and thought it might be a good idea to learn a few things about how to bead to get the results I was seeking and how to make sure I was securing the beads so that they wouldn't start coming off later on.  I worried about my heavily encrusted pieces starting to fall apart over time. LOL

The other day, as I was planning to start my March BJP piece, I pulled the DVD out again and reviewed it.  I love Lyric's clear and easy manner of speaking.  Its like having her sitting with you in your family room.  The DVD has great visuals and its easy to see what Lyric is talking about as she demonstrates it with great close-up shots of her work as she repeats the stitches to make sure that you really understand.

Lyric explains beading terminology and covers many topics from testing for colour-fastness (never would have thought of that for glass beads!), to needles, threads, and beads themselves. Bead It Like You Mean It is 90 minutes long, divided into 7 chapters.  One of my favourite chapters taught me how to make fun bead cages (the inspiration for the binder cover I made for myself).
close-up
Binder Cover: Shisha mirrors
secured with beaded cases.
Another great tip is how to embellish a finished quilt top, working from the top of a finished quilt without making a mess of the back of the quilt with knots and travelling threads.

Bead It Like You Mean It is full of good tips and tricks to make beading fun (read addictive) and even portable.

Here are some images of Lyric's work from the DVD:

Beautiful lines ending in fun spirals
 -what a wonderful way to 
embellish a quilt.
Don't you love the texture of these
 beads mixed with the stitch!
I love these wonderful bead stacks!

Lyric's bead cages capture her
lovely cabochons.

Watch this short video clip to get a peek at Lyric's easy, down to earth teaching style.

Want to win a copy of this great DVD?  Lyric has generously offered to provide me with a copy of the DVD so that I can give it to one of my wonderful followers (that's you!).  Leave me a comment by the end of the day on Sat. March 24th, telling me why you just have to have this beading DVD and what your beading goals are.
Want a second chance to win? If you have a blog, put a post on your blog with a link to this give-away (and leave me a comment linking to your post) and you'll get a second chance to win! 

I will post the winner's name on Sunday, March 25th.  Good Luck!

Monday, March 12, 2012

Texture Tuesday: Free and Easy

This weeks prompt for Texture Tuesday was 'free and easy'.  We were to choose any photo and add one of Kim's textures.  I took this picture back in the fall when I was out driving in the country.  You've got to love that face!  Wouldn't this make a great poster in an orthodontist's office? LOL

Mouse over photo to see the 'before' image.

Sunday, March 11, 2012

Preparing a New Journal to Go

 I've been preparing a new journal to take along with me on a bit of an 'escape'.  I started with 9" x 12" sheets of watercolour paper.  I folded them in half (one at a time to get the best crisp fold), nested them into one another and then sewed them together by stitching down the centre fold on my sewing machine (I used the longest stitch possible and a good strong thread).

The next step was to pull out some stencils and my watercolour paints and just start to play.

I love the tone on tone effect of these numbers overlapping one another in various shades of aquas and blues.


This page got a bit dark at one point so I used a dampened paper towel and brought it back to what you see here.  I also like that it resulted in softer lines and shapes.
 I started this page by stamping the stamp using a deep brick coloured stamp pad.  I inked the stamp once and then stamped it five times, letting it gradually fade out as it went up the page.  I then reversed it on the facing page so that the dark image is at the top fading down to light.
 This page was all about creating lines and streaks in those beautiful pink tones.  I can see using some of those lines for some beautiful lettering.
 I see some Van Gogh 'Starry Night' coming out of this page.  I went a little further with this page, already adding some more stamping to get more texture.
 Simple pale blue with a bit of brown stamping.  I love that stamp!
I'm craving a Tequila Sunrise...hmmm, I haven't had one of those since my misspent youth! LOL
 I was playing with colour mixing here, but the green really didn't come through as much as I might have expected.
Not sure what happened here, but this page might end of being a close-up of some weird face or something.  I feel some funky eyes looking at me...
More stamping and a fun bit of striped gaffer tape on the spine of the journal.  

The next step is to add more elements, texture, stamping, etc. to the pages before I actually start to journal.  Of course, it's been made to fit perfectly into my 'Journal on the Go' cover so I can take it with me while I'm travelling, pens, markers, homemade washi tape and all!

Friday, March 9, 2012

Whisper in the Rain

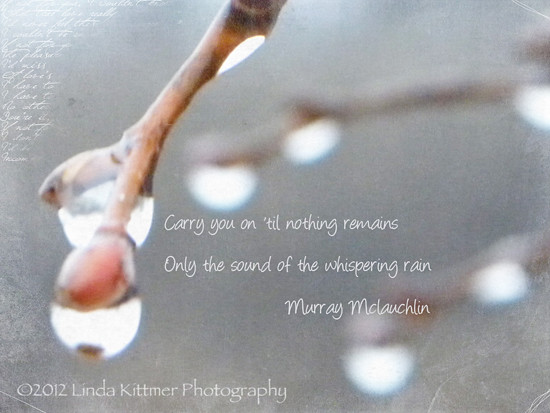
This image was taken on a cold, dark rainy day a couple of months ago.  In Beyond Layers, Kim Klassen's prompt this week was Whisper.

Mouse over photo to see the 'before' image.

I added a couple of Kim's textures, 'scripted edges' at screen 85% and 'the veil' at multiply 26%.  I love the bit of text in the upper left corner and the lines from Murry Mclauchlin's song.

Wednesday, March 7, 2012

Playing With Shadows

Today I spent some time in the studio playing around with shadows.  I love adding that layer of black under shapes to give the illusion of the shapes floating above the piece.  The colours in this were inspired by Vicki Welsh's colour palette from the colour palette challenge.

The background was pieced and the rest has been fused.  The next step will be the quilting.  I love this part because it just seems to bring the piece to life.  I'll post again once it's done so you can see where I take it.

Thanks for visiting today.  Have an artfully wonderful day!

Tuesday, March 6, 2012

Bead Journal Project: February

Well, I'm a little late, but here's my finished piece for the Bead Journal Project.  


I started with the purple heart, not because of Valentine's Day, but because of it's representation of the purple heart for bravery.  To make the heart, I used a long piece of copper wire, strung it with random beads in purple tones and then bent it into the shape of a heart.  From there, I just works one area at a time, letting the piece tell me where to go next, until it was done.  
This picture shows the January and February pieces together as they will eventually be put together.  Watch for the progression of the final piece as it develops over the year.  I'll do my best to get them done on time from now on ;o)

Monday, March 5, 2012

Texture Tuesday: White

With the theme 'white', daisies are just the perfect flower to photograph.  That little pop of yellow and green bring a added life to such a classic, simple flower.  Daisies make me think of childhood and innocence!  "...loves me...loves me not..." Oh the sweet memories of lazy summer days with my friends. 
Thanks for visiting!  :o)

Sunday, March 4, 2012

The Kindness Chronicles

Well, it's the first Sunday of March and time to share The Kindness Chronicles.  I always tend to hold doors open for people, so I forget that that is certainly an act of kindness.  I'm especially aware of opening doors for elderly, mom's with strollers, etc., but I'll hold the door for anyone who is coming behind me.  It's just one of those small things that I appreciate and like to pass on.

Well, last week I decided to buy a coffee for a stranger who was behind me at the Tim Horton's drive thru and that was really fun.  I think that the best part about doing this sort of this is that the person doesn't get a chance to say thank you.  My hope is that maybe they will 'pay it forward' some day, knowing how they felt in having it done for them.

I'd love to hear what you've been doing to bring a smile to someone's face.  Thanks for visiting :o)


Saturday, March 3, 2012

Playing Catch-up

You would think that with the extra day we had in February due to the leap year that I could have finished my Bead Journal Project piece on time.  But, as you can see I have barely started it.  I was so busy playing with lettering in Joanne Sharpe's Letter Love 101 online class that I neglected a lot of other art projects that I have on the go.

Well, for the next few days my focus will be on beading.  I hope to be able to post about the finished piece in a few days.  Wish me luck!

Friday, March 2, 2012

Putting My Personal Touch Into Digital Scrapbooking and a Give Away

Want to win some scrap-booking software?  Please read on...
In addition to the art and photography you see here on my blog, I have also started to do some digital scrapbooking and making photo books to celebrate milestones and special vacations.  When I was given the opportunity to check out a scrapbook software called My Memories Suite I decided to download it and give it a try.  I discovered that it's easy to use and I was able to  create these two pages quickly and easily.  The best part was that I was able to import my own background papers (the top one is a scanned image of one of the ones I recently made using stencils and paints, and the musical notes page was downloaded from Free Vintage Papers blog, a blog that offers free digi-papers and digi-stamps.  Look for Pamela's link on the right).


Of course My Memories Suite comes with it's own theme packs including backgrounds, layouts, and lots of fun extra like brads, buttons and ribbons so that you can simply drag-and-drop your pictures into the beautiful layouts they provide. Notice that fun thought bubble on the above page? That was as simply as clicking on the photo and then selecting the shape.  The software does the rest!  In addition to the themes that come with the software, there are additional theme packs available on their website for purchase at reasonable prices and there are also a bunch of them that are free!

So, here's the exciting part.  The folks at MyMemory Suite have given me an extra FREE copy for me to give away to one of my lucky readers (that's you!).  Here's what you need to do for a chance to win:

1. Go to MyMemories Suite and take a look at the theme packs;
2. Sign up to be a follower on my blog (or let me know if you already are a follower;
3. Leave a comment, letting me know which theme pack is your personal favourite.

Please sign up to follow my blog and leave your comment before the end of Friday, March 30th.  A winner will be randomly selected and announced in a blog post on Saturday, March 31st.  The winner will then have 5 days in which to contact me with their email address so that I can send them the necessary code to download the software at no cost.

For those of you who can't wait, you can use this code STMMMS18464 for a $10 discount on the purchase of MyMemory Suite (you get it for $29.95 instead of $39.95) AND you'll get an additional $10 gift certificate to use in their online store.  Simply copy & paste STMMMS18464 into the promo code box on the shopping cart page.  Use the link near the top of this page, on the right side, or click here.