 I've been working up the nerve to do some painting on canvas, but this is not something that is in my comfort zone. In the last few weeks I've been watching Karen Ellis of The Art House Studio during her live Ustream broadcasts on Friday evenings, and I've learned a lot about how to get the wonderful layered look that she does so well for so many of her backgrounds. Combine that with lesson 17 of Joanne Sharpe's Letter Love 201, in which we were to get out a little 6 inch canvas and some acrylic paint to create a 'Character Mastepiece" and I thought what the heck. If I was going to jump in, why not jump in with both feet. If one is good, three must be better...
I figured I had little to lose since I got the three little canvases at Dollarama, and with it being acrylic paint, if it was a total disaster I could always paint over it...
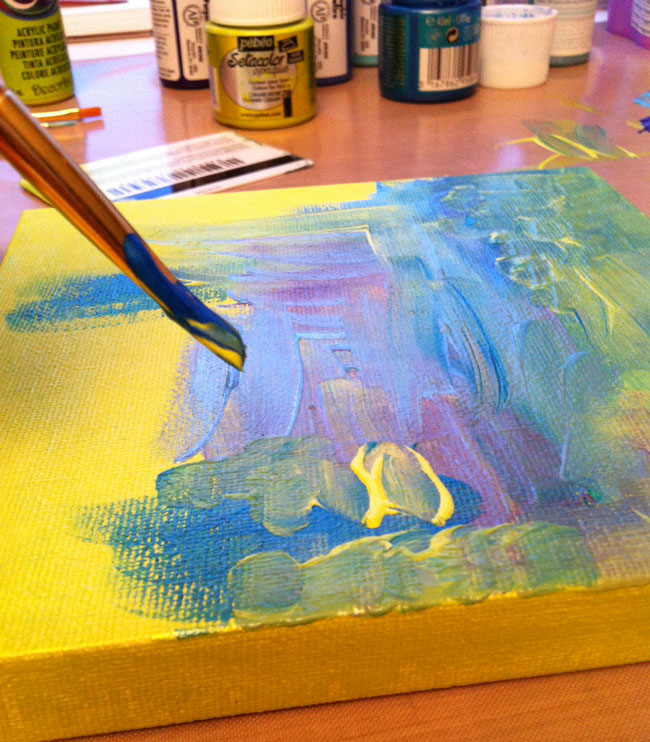
 I started by painting all three of the canvases with a base coat of a bright lime green. I then used a combination of my brush, and an old gift card and started adding some blues and a bit of purple along with more of the lime green. A couple of the blues and the green are metallic paints, so they have a bit of a shimmer to them.
Using a stencil and a baby wipe, I added a bit of white. The final step in creating the backgrounds was to use a bit of corrugated cardboard to stamp on each of the canvases.
Below you can see the three canvases side by side, as well as my messy work area. Now that I've got a good craft mat, I tend to put the paint right on the mat. It wipes up beautifully with baby wipes and I find it's easier than using a palette, especially when I want to stamp with corrugated cardboard or my ammo case insert (a great find at Waste Wise)

I must say, so far I was thrilled. I actually achieved the layered look that I so admire in Karen's work! The next step was to add a letter to each of the canvases. I decided that since I had three canvases I'd use a three letter word. I was going to do ART, but then I thought why not use the word I have chosen as my inspirational guiding word for 2013 and so, I painted JOY on my little canvases.
I found this fun font online when I did a Google search for fonts (looking at the images tab) so I sketched out the letters, transferred them onto my canvases and started painting. I used a gold metallic paint, along with a bright yellow for the highlights and black for shading (as you can see, this time I did use a palette since I was painting with a brush and my finger). I must say, I'm very happy with how these little pieces turned out.

 And here you can see it hanging in my studio. I'm not sure I like that arrangement, but I'll leave it like that for now.