

Thursday, May 31, 2012
Intentions


Wednesday, May 30, 2012
Bead Journal Project: May
 I finished my May BJP piece and I've got a full day to spare! The colour inspiration again comes from Vicki Welsh's Colour Palette Challenge.
May has been about gardening and enjoying the beautiful spring weather we've been so fortunate to have. I started off with the three larger flowers with their long stamen.I then went on to do a collection of fun little flowers that stood up on bugle bead stems. Pulling in the various colours of the palette, I just continued to fill in areas as I was inspired and slowly the piece came together.
Here is the finished piece for May:

And here is the growing spiral, January through May:

Change
Yes, today's word in Beyond Layers is 'change'. I had two great quotes and I couldn't decide between them so I used them both. For a change, I've given you both images to compare at the same time instead of using the 'mouse over'.

Tuesday, May 29, 2012
Peace
 |
| Mouse over photo to see the 'before' image. |
Kim's word for today, in Beyond Layers, is peace. You can see from the 'before' shot that I cleaned up the branches that were in the top right corner and then altered the tree line at the bottom. I used a painterly texture from Jerry Jones at Shadowhouse Creations.
Monday, May 28, 2012
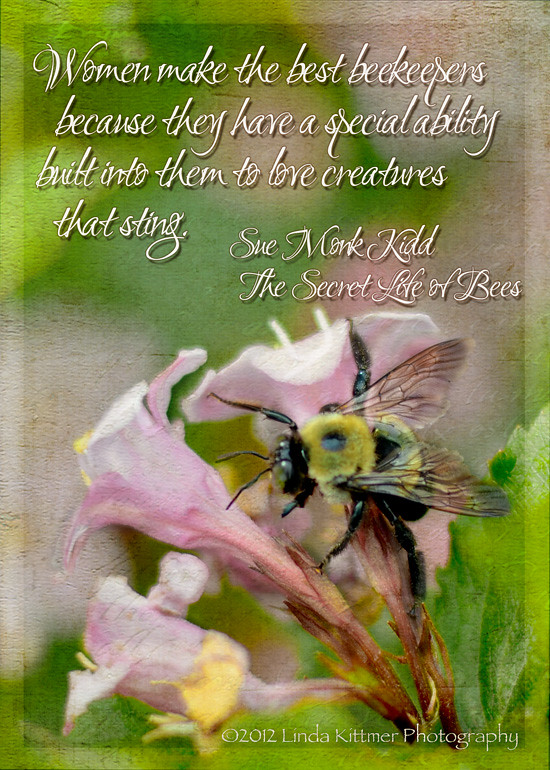
Beekeepers
 |
| Mouse over photo to see the 'before' image. |

I have added Kim's 'Sunday' texture as well as Bonnie's 'Antique Farewell' texture. I've also added this minimally processed version, to the right, because I really love the original shot, too. I just did a bit of cropping and added the subtle frame.
Saturday, May 26, 2012
Breaking News

I'm sorry to say that computer gremlins have reeked havoc on some of the images on my blog and I have not been able to correct the problem. In this case, the process shots are missing, but I was able to restore the image of the finished piece, and some close ups of the stitching which are at the end of the post.
No, I don't have anything particularly exciting to report other than I've finished a piece I've been working on rather extensively over the last few weeks. 'Breaking News' is the title of my newest mixed media piece. It started with a cup of tea...
Last summer Doeteke, a friend of mine, was saving tea bags to use in her art and as I was drinking a cup of tea a couple of months ago I remembered this fact and started to save my own tea bags. Then, in April, Heather presented our GOE group with a challenge that involved using newspaper and the wheels started turning.
 |
| Sorry this image has gone missing and I can't restore it...computer gremlins reeking havoc! |
 |
| Sorry this image has gone missing and I can't restore it...computer gremlins reeking havoc! |
 |
| Sorry this image has gone missing and I can't restore it...computer gremlins reeking havoc! |
I pulled out more paint, this time adding various metallics in coppers and golds as well as the original colours I had started with. I also collaged some of the tea bags on at this point to try to get more of a subtle effect with the wine labels. The tea bags are great for this because they have some opacity to them. I was beginning to see hope at this point. Ironically however, the more paint I added the less of the underlying collage I could see.
I have also been experimenting with rust dying lately and thought that some of the rust dyed fabric would work well on this piece.
 |
| Sorry this image has gone missing and I can't restore it...computer gremlins reeking havoc! |
I cut several random circular pieces (freehand so they wouldn't be perfect), and I started laying them on top of the painted piece, auditioning their placement. I settled on a gentle curved path that rose up from centre left and then curved down toward the bottom right corner. The piece was looking too monochromatic at this point so I added some bits of a sheer black fabric to break it up a little.
I then grabbed a paint brush and some white paint to give it some pops of accent colour. I started by painted the three circles near the centre left and then I created another random pathway, using straight lines and adding a few square shapes. I also did some stamping using an old potato masher. As I was adding the white I was sort of wishing I hadn't because it was just too glaringly bright.
Seeing as the paint had for the most part obscured the newspaper and wine labels, I wanted to bring in some more newsprint (Remember the GOE challenge!) so I started tearing narrow strips and collaged them overtop of my white painted lines. It was perfect to knock back the starkness while still keeping some accent. A few more teabags were collaged over the potato masher stamps to knock them back a bit too. By the way, at this point, the vineyard article was long gone and I was using newspaper from the front page of the paper. That's when the name of the piece came to me. Breaking news. I was literally breaking (or tearing) news stories, and I was seeing words about killings, blood, etc. That and the random areas of red paint, the footprints (or are they finger prints?) created by the potato masher stampings, and I began noticing 'evidence' appearing as if at a crime scene.
The next step was to layer it with batting and a backing and take it to the sewing machine for literally hours of intensive thread sketching/quilting. I used a coppery red colour thread to highlight some of what I now saw as blood stains, as well as doing the pebbling effect on the rust dyed circles for some added texture. A gold thread was used to bring out some of the areas that had been painted with the metallic paints, and the rest was stitched with a subtle taupe colour to create texture while at the same time pushing those areas back a bit.
Here are a few close up photos showing the stitching. Click on them to enlarge, if desired.


And finally, here again is the finished piece, trimmed and ready for hanging. I photographed it on a black background so that you can more easily see the shape of the finished piece.
Thursday, May 24, 2012
ATCs From Trimmings
 I working on a piece of mixed media art right now (almost done) that involves paint, fibre and paper collage and a lot of stitching. Yesterday I was trimming it up and I just couldn't bring myself to throw away some of the more interesting bits that were left over. Instead, I pieced them together and made a couple of ATCs. Waste not, want not!

Life at the Cottage

Couldn't stop at just one... this is a photo of my son, taken about 10 years ago.

Wednesday, May 23, 2012
Combining My Photography and Lettering


Yesterday, while playing around with my pens I decided to print a copy and do some lettering right on the photograph so that I could use my own hand lettering to add a message instead of adding text in Photoshop. I was pleasantly surprised by how well the pens work on the photo paper.
The black was done with a Copic Multiliner. I used a Sakura Gelly Roll for the highlights, and finally put in some shading with a grey Copic Ciao.
Tuesday, May 22, 2012
Step One: Prepare Substrate
Well, as I said in yesterday's post, you'd probably be seeing this image again. I was so inspired by the colours in this altered photo image that I couldn't wait to get in onto some fabric so that I could begin some hand stitching and beading on it.
I found some pale yellow woven fabric at a thrift store a couple of months ago. It's fairly stiff and it has a good salvage edge, so I cut it to 8 1/2" x 11", crossed my fingers, and fed it into my printer.


I've used Misty Fuse to adhere it to a piece of wool felt and did a bit of machine zig zag on the edges to keep it from unravelling while I do the hand work.
I'll post the finished piece once I have it stitched, beaded, embellished...
Subscribe to:
Posts (Atom)