Saturday, July 20, 2013

Doodling with a Friend...

One of the things I love about doodling and sketching on the deck at the cottage is that I've always got company!

We call this little guy "Out Back Jack"...'cause he lives out back.  He loves to visit for black sunflower seeds or peanuts, but even if I don't have any he comes up and sits on my knee or sketchbook and just visits.  He's so tame I can pat him!
 I'm working on lesson #4 for Doodle Arts and Letters, another Joanne Sharpe online class.


I used my Marvy II markers to colour this because I forgot to pack my twinks!

Thursday, July 18, 2013

Birch Journal Cover

A while back I made a journal cover and I really liked the process, so I've decided to make more using the same basic technique.

I start with muslin that has been soaked in a 50/50 mixture of PVA glue and water, which gives it nice body and a wrinkled texture. After soaking the fabric, hang it to dry. Once dry, you're ready to start painting.

I use a make-up sponge to add a diluted acrylic paint to create the background.  In this case a sky and grass.


Then I used a StencilGirl stencil called Trees by Mary Beth Shaw. I traced over the outlines with black waterproof pen to highlight the trees and I added in some lines to create the birch bark effect.


The leaves were created using Web by Mary Beth Shaw.


And here's the completed journal cover.  Check back on July 22nd when I'll be doing a detailed tutorial, giving you the measurements  etc. for how to make one of these journal covers yourself.


Tuesday, July 16, 2013

Ann's Rusty Sewer Grate...

I've been working on the next GOE challenge piece, which required us to use the inspiration of a rusty sewer grate that is on a golf course in Mexico.  My friend Ann was busy taking photos of the grate while golfing...is this why she never made the Women's PGA tour???
I started by manipulating the photo in Photoshop Elements so that I could create a unique collage of the many rusty lines in the grate.
 I used machine stitch to create some of the grass, using long free motion stitches.  I also thread sketched in all of the black areas between the grate lines to make them recede further back.


Hand stitch was used to create bolder grass lines in some areas and then I used French knots and some simple straight stitches to further encrust the rusty grate lines.  I intentionally let the rusty areas rise up from the surface to create the 'bubbling' texture that rust creates on metal.

It has been framed in a 12" x 12" frame.


Sunday, July 14, 2013

The Indigo Fabric Reveal...

As you know from some previous posts, my friends and I did some indigo dyeing while up at my cottage.  This photo is an indication of what the back yard looked like.  We had plastic drop sheets everywhere so that we could lay out the fabric while it oxidized, before we rinsed it and hung it to dry.  We all discovered that we aren't too keen on wearing rubber gloves, so after a while the gloves came off and we all ended up with blue under our nails (among other places LOL).
Indigo is a fun (but smelly) process.  I wish I had more photos to show you the process, but I didn't want to risk the safely of my camera while I was working.  Once dipped, the fabric is a bright lime green colour and it only begins to turn blue when it is exposed to the air and begins to oxidize.  We all wished we could have somehow captured some of the wonderful patterns of blues and greens, but it was short lived.
FYI:  Shibori (絞り染め Shiborizome?) is a Japanese term for several methods of dyeing cloth with a pattern by binding, stitching, folding, twisting, compressing it, or capping. Some of these methods are known in the West as tie-dye.  Want to know more...click here.

Here are the fabrics I ended up with, paired with the original photos I had posted of my prep: (captions provide a bit more detail on the prep used)
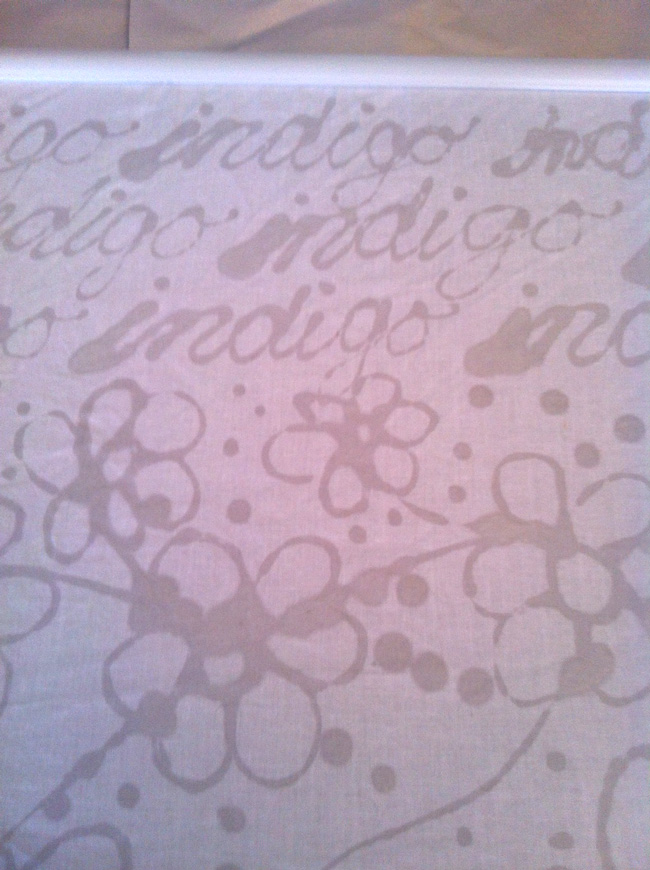
Wax resist using soy wax and a tjanting tool.


Accordion folded fabric clamped with plastic buckles as a resist


Rubber bands used as a resist

Fabric crumpled into a ball and then secured with rubber bands.

Floral glass 'half marbles' secured with thread

Accordion folded fabric secured with clamps

Accordion folded, straight and triangle fold, one clamped with round washers
Accordion folded and secured with rubber bands and string

Stamped with text using Stazon Ink


Hand dyed fabric, soy wax resist using tjanting tool and then over dyed

Fabric wrapped around PVC pipe, secured with string and then scrunched together
(Sorry, I forgot to get a photo of the prep.)

Machine stitched then dyed

surface design on cotton velvet, over dyed

Soy wax resist using tjanting tool

Masking tape and soy wax resist using tjanting tool
Soy wax resist using tjanting tool
T-shirt, folded into thirds and secured with rubber bands

Friday, July 12, 2013

Rainbow Dyeing...

I know you're waiting to see the results of my indigo dyeing...and I'm chomping at the bit, wanting to get to it, but I promised my friends I'd wait until they came up and do the indigo dyeing with them. But, I just had to get into some messy fun, so I did some dyeing with Procion MX dyeing this week instead.
It's the perfect time of year to do dyeing because I can work outside on the picnic table and I don't have to worry about getting dye stains all over.  I discovered that an old wallpaper tray was a great size and shape for the zip lock bags of fabric so they were all neatly contained while I waited for them to process for 24 hours.  I mixed the dye in old mason jars, but I wouldn't recommend them.  I need to get some plastic bottles like these!
Anyway, after I rinsed all the fabric I couldn't resist taking some pictures of it hanging on the line.
Notice that Casey is still her beautiful cream coloured self!

Even the ziploc bags get rinsed and hung on the line for the next time I dye fabric.

And here's my stash!  The fabrics under the stacks were made using the left over dye after I finished the measured rainbow dyeing.

a light gauzy cotton (usually used for men's turbans)


cheesecloth
recycled Egyptian cotton bed sheets

I can't wait to start creating with all of these fabulous colours!

Wednesday, July 10, 2013

Soy Wax Batik...More Indigo Dyeing Prep

I can't believe how much fun I'm having doing all the preparations for our retreat at my cottage.  We're going to be experimenting with indigo dyeing for the first time and I've been preparing fabric to create lots of fun and interesting results (I hope)!


I found this fabulous mini electric frying pan in a thrift shop ($3.00!) and it's perfect for melting my soy wax.  I'm using a little tin inside the pan so that I can use less wax but still get enough depth to dip my tjanting tool into the wax and fill the little bowl on it.

I started out doodling circles on a piece of cotton using the tjanting.  As you can see, it sometimes drips larger drops of wax, but I love the randomness of that and I love dots so it's all good!
I liked the doodled circles and polka dots so much that I decided to grab an white tank top from my dresser and I put a row of the circles around the neckline and then added dots randomly all over the front and back of the shirt.
One the next piece I started by using the tjanting to write the word indigo repeatedly and then after a few rows of that I doodled some simple flower shapes.  I connected them with some thin lines and added more dots...dots are good!
This next piece was first taped using masking tape, and then I created various line patterns within the rectangles and squares that I had masked off.  I did another similar one in which I doodled various circle patterns inside the spaces, but I forgot to take a shot of that.
The final piece done with the soy wax resist is this piece of hand dyed green that I decided I wanted to over dye.  I created a design of doodled circles and dots. Again, I forgot to take a photo of it once I finished with the wax, but this shot 'in progress' give you an idea of where I'm going with it.  I can't wait to see what these look like after they're dyed with the indigo!
 In my last post, I had folded and clapped some fabric, so today I decided to see what would happen if I pressed the fold lines to make them more distinct.  This piece was them clamped with some plastic belt buckles that I found at a discount store.
Another idea I wanted to try was using rubber stamps and 'Stazon Ink'.  I love text in my work, so the first stamp I used was this wonderful called 'Creativity Flows', by Traci Bautista, from her Grafitti Glam line.
Then I went into my stamp stash and pulled out another few that I especially like.  Sadly I don't know what they're called or where they came from...collected over the years from a variety of sources.  I imagine using some of these as small elements within larger pieces and others as great backgrounds.


 The final experiment for now is a small piece that is a layer of tissue paper over top of a bit of fabric.  I stitched the two layers together using a straight stitch on the machine.  I hope that the tissue paper doesn't just disintegrate when it gets wet.

Hopefully my next post will be of a whole lot of beautiful indigo pieces!  Until then, have a fabulous day!